How to Add and Manage Vendors
1. Overview
Vendor Management in Inaya
A Vendor (or Supplier) is an external business entity, organization, or individual that supplies goods, raw materials, inventory items, or services to your organization.
Managing vendors effectively keeps procurement financially disciplined and operationally efficient.
Navigation Path:
2. Why Is Vendor Management Important?
A clean vendor master ensures every purchase transaction is linked to a verified supplier.
3. Requirements to Add or Manage a Vendor
Requirement | Description |
|---|---|
User Access | The user must have permission to create, edit, or delete vendor records. |
Vendor Information | Legal/trading name, location, and onboarding date are mandatory. |
Supporting Details | Additional charges (delivery, shipping), tax rules, and payment terms if needed. |
Item Mapping (Optional) | If pricing is to be predefined, know which inventory items the vendor will supply. |
Approval Workflow | Some organisations require approval before a new vendor is used in transactions. |
4. Scenarios and Examples
Scenario 1: Registering a New Pharmaceutical Supplier
A pharmacy needs to source from INAYA PHARMACY LIMITED.
Vendor Name: INAYA PHARMACY LIMITED
Location: Dar es Salaam
Date: 2026-08-11
Once saved, the vendor can be selected when raising a Purchase Order.
Vendor Record Actions
Action | Description | Example |
|---|---|---|
Create | Register a new supplier. | Adding a new pharmaceutical distributor. |
Update | Modify vendor details or assigned items/pricing. | Updating delivery charges or location. |
Delete | Remove an inactive or duplicate vendor. | Removing a supplier that no longer operates. |
5. Step-by-Step Guide
Step 1: Navigate to the Vendors Module
The Vendors view shows all existing supplier records.
Step 2: Open the Vendor Creation Form
Click the Add Vendor ( + ) button on the action bar.
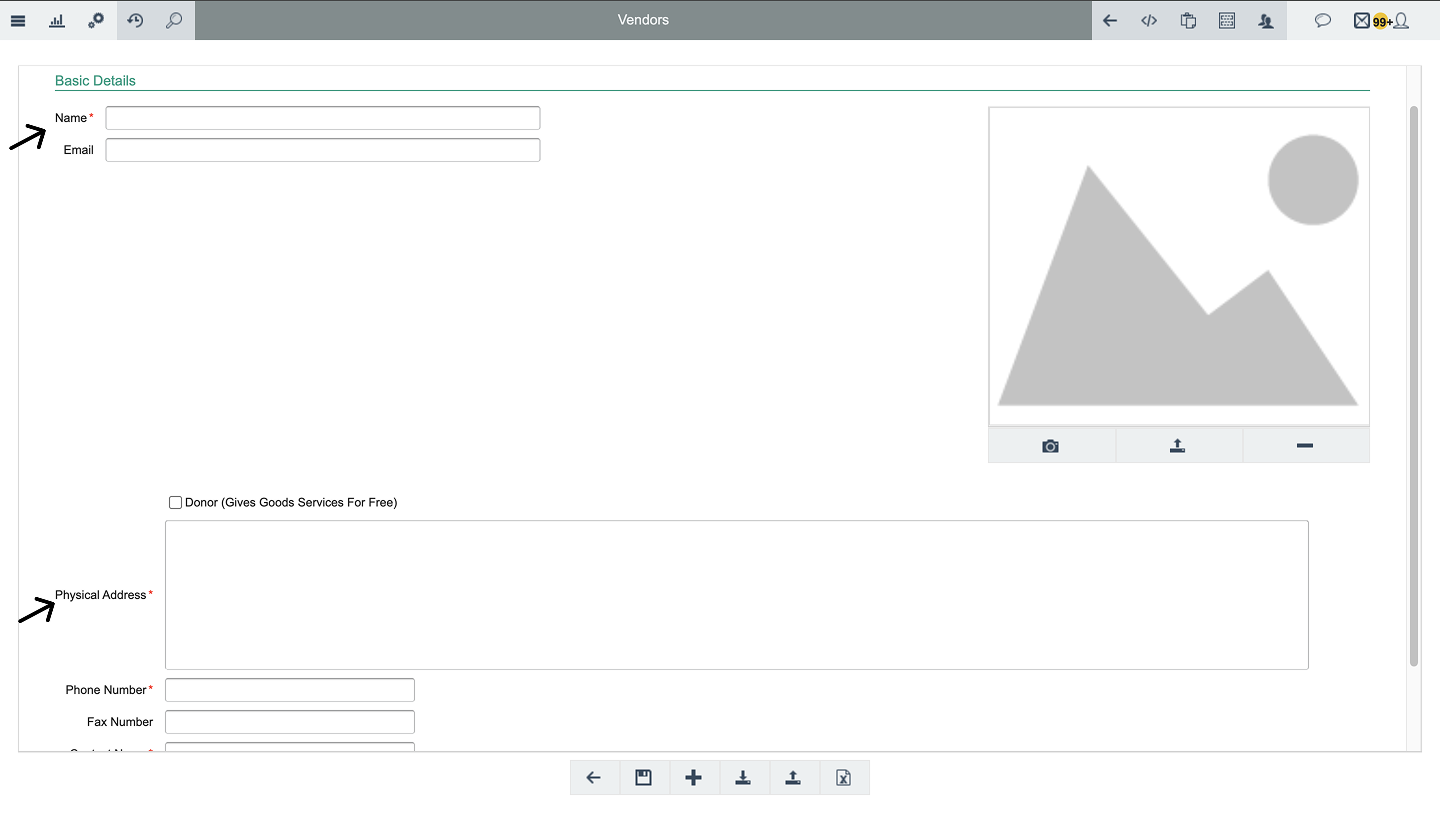
Step 3: Fill in Vendor Profile Information
Enter the required fields
Vendor Name: Registered legal or trading name (e.g., INAYA PHARMACY LIMITED).
Location: Physical address, branch, or region (e.g., Dar es Salaam).
Date: Onboarding date.
Additional Charges: Recurring delivery, shipping, or handling fees.
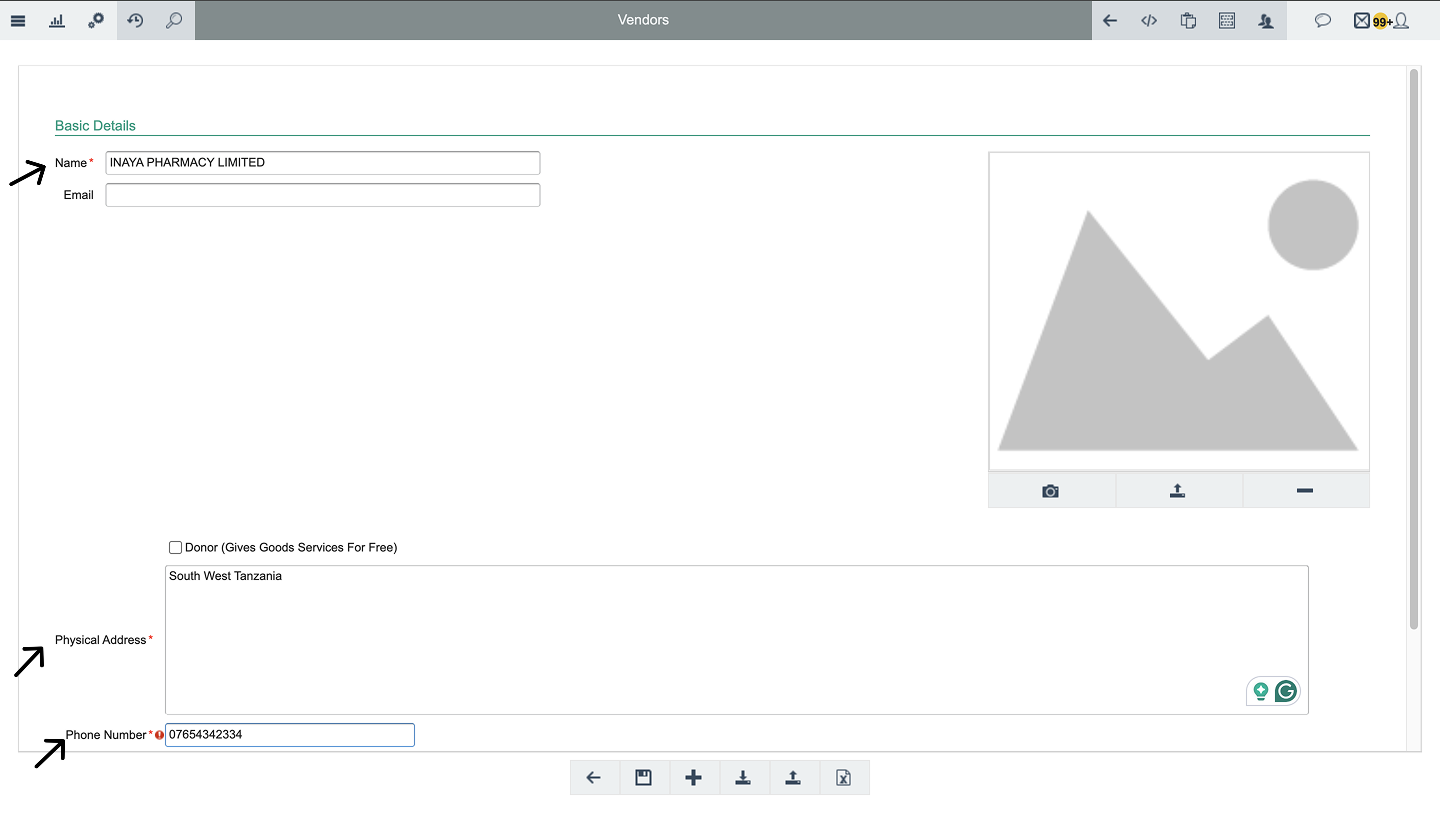
Step 4: (Optional) Configure Additional Settings
Assign inventory items, packaging units, default pricing, tax rules, and capacity limits. These can also be added later via the edit function.
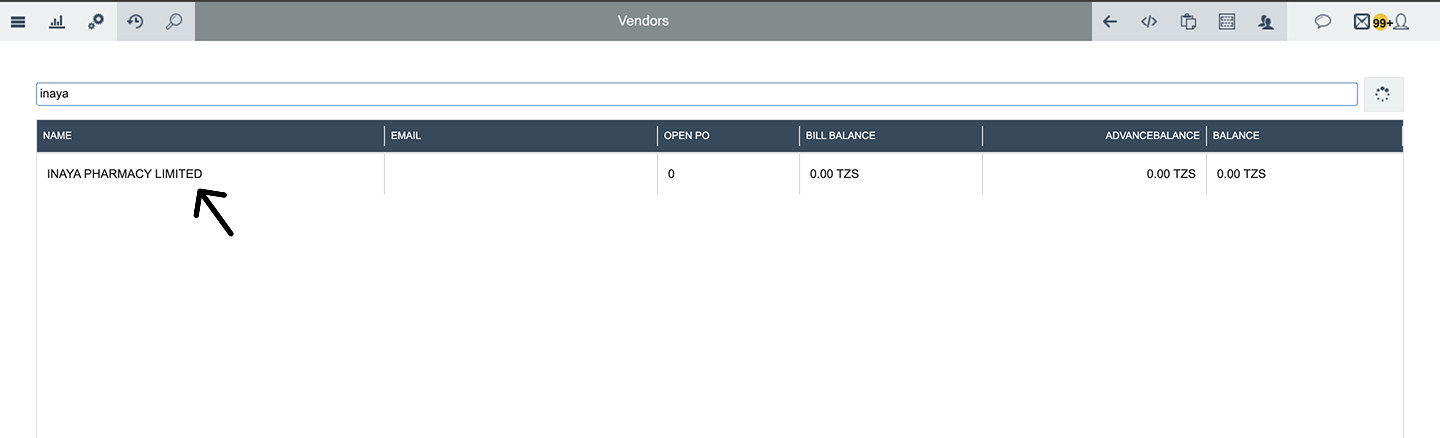
Step 5: Save and Verify
Review all details and click Save. The new vendor appears in the Vendors table and is immediately available for Purchase Orders.
Edit Vendor Information
Open the vendor’s profile.
Click the Pencil (✎) icon.
Modify: Business Name, Location, Onboarding Date, Assigned Items, Packaging Units, Default Pricing, Tax Rules, Funding Accounts, Capacity Limits.
Click Save.
Delete a Vendor
Open the vendor’s profile.
Locate the negative (-) icon on the top-right action bar.
Click it to initiate vendor removal.
Confirm the deletion prompt.
Viewing the Vendor Price List
Inside the vendor profile, find the Price List or Items section. It displays all mapped inventory items with unit prices (e.g., TZS), packaging units (Box, Bottle, Pack), and extra charges.

6. What Happens After Saving?
Event | What Happens |
|---|---|
Vendor Created | Appears in vendor selection lists for Purchase Orders. |
Vendor Edited | Updated information propagates to future transactions; existing records stay unchanged. |
Vendor Deleted | Removed from vendor table and selection lists (if no dependencies exist). |
Price List Stored | Default pricing is available during order creation. |
Audit Trail Recorded | Every addition, modification, and deletion is logged with user and timestamp. |
7. Configurations
Configuration | Recommendation |
|---|---|
Mandatory Fields | Vendor Name, Location, Date marked as required. |
Additional Charges | Define charge types (Delivery, Shipping, Handling) for consistency. |
Tax Rules | Pre-configure applicable tax codes for vendor-specific items. |
User Permissions | Assign distinct roles for creating, editing, and deleting vendors. |
Duplicate Check | Enable duplicate name checks to prevent near-identical entries. |
Capacity Limits | Set maximum order capacities where supplier constraints exist. |
Inactive Vendor Flag | Use a status flag instead of deletion for vendors with history. |
Example Vendor Configuration
Field | Example Value |
|---|---|
Vendor Name | INAYA PHARMACY LIMITED |
Location | Dar es Salaam |
Date | 2026-08-11 |
Additional Charges | Delivery – 5,000 TZS |
Assigned Items | Paracetamol, Amoxicillin |
Default Tax Rule | VAT 18% |
8. Common Problems and Solutions
No. | Problem | Possible Cause | Solution |
|---|---|---|---|
1 | Cannot save vendor – error message | Missing mandatory fields | Check all required fields and fill them completely. |
2 | Vendor not appearing in Purchase Order | Vendor not active or not saved properly | Verify vendor exists in the Vendors table and is active. |
3 | Duplicate vendor entries | Multiple users created the same supplier | Search, merge if possible, delete the extra entry. |
4 | Cannot delete vendor | Vendor linked to existing transactions | Mark vendor as inactive instead. |
5 | Price list not visible | Items not assigned to the vendor | Edit vendor and add inventory items with default pricing. |
6 | Wrong currency or tax applied | Incorrect vendor tax configuration | Update vendor's tax rules and ensure pricing unit consistency. |
7 | Edit icon not clickable | Insufficient user permissions | Contact administrator to grant vendor edit rights. |
8 | Additional charges not reflecting in PO | Charges defined but not set as default | Ensure charges are saved as part of the vendor profile and assigned. |
Quick Reference
Step | Action |
|---|---|
1 | Go to Main Menu → Finance → Purchase → Vendors |
2 | Click Add Vendor (+) to register a new supplier. |
3 | Enter Vendor Name, Location, Date, and Additional Charges. |
4 | Save the new vendor record. |
5 | To edit, open the vendor and click the Pencil (✎) icon. |
6 | To delete, use the negative (-) icon (if permitted). |
7 | View price lists inside the vendor profile to see items and costs. |