How to configure prices and billing unit to an inventory item so that it can be sold
1. Overview
In Inaya, configuring the price and billing unit allows you to define how an inventory item will be sold. After registering an item, you need to set the unit used for selling and assign its selling price. This ensures that the correct item, unit, and price are used during sales transactions.
2. Why is it important?
Configuring the price and billing unit is important because it allows you to sell the item correctly. It helps ensure that the right price is charged based on the selected unit and makes it easier to track sales and item usage accurately.
3. Requirements to set
Before configuring the price and billing for an item, make sure: The item you want to configure is already registered. You have the required permission to set item prices. The billing categories you want to assign prices to are already configured.
4. Scenarios and Examples
After registering an item: Once an item has been registered, you need to configure its selling price before it can be sold. Setting additional charges: If the item has additional charges, such as VAT, that should be applied to the item, you can configure them. Setting a profit margin: If you want to make a specific profit from the sale of an item, you can configure the required profit margin.
Example:
After registering Paracetamol, suppose the item is sold as 1 tablet at TZS 100. You can configure Tablet as the billing unit and set the selling price to TZS 100 per tablet. If you set a 5% profit margin, TZS 5 of the TZS 100 selling price represents your profit. You can also configure VAT as an additional charge if VAT applies to the item. This allows the applicable VAT to be added to the sale. also you can add other additional charges if needed example service charge, delivery charge
This ensures that when 1 tablet is sold, the configured price, profit margin, and applicable additional charges are correctly applied.
5. Step-by-Step Guide on how to configure prices and billing unit to an item
Configure item billing and price
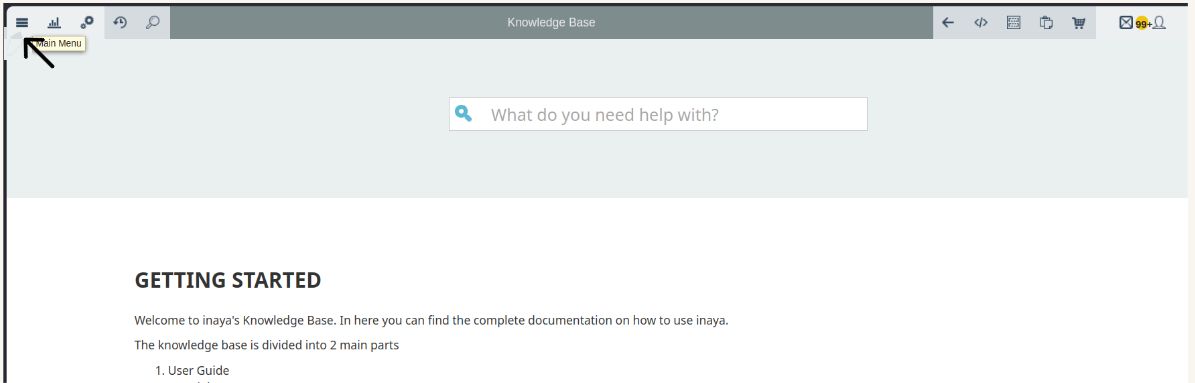
Log in to Inaya and open the Main Menu.
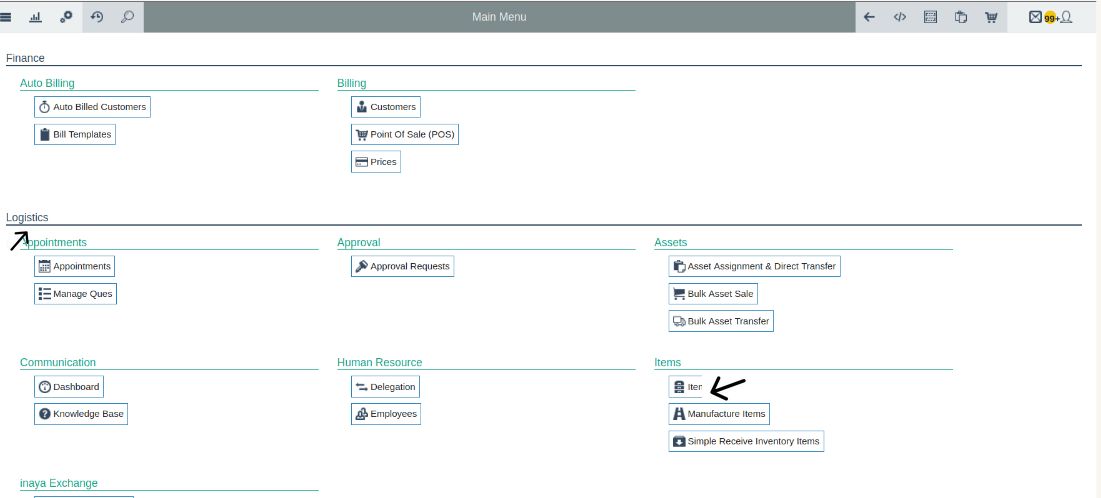
Scroll down to Logistics, then select Items to open the Items page.
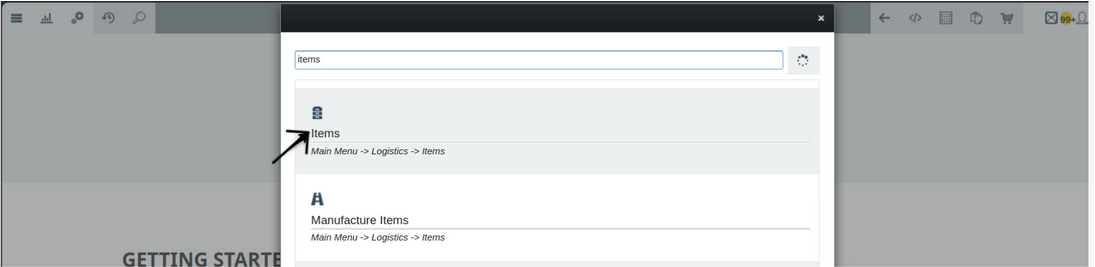
Alternatively, click the Search icon in the top-left corner, type
Itemsin the search box, and select Items from the search results.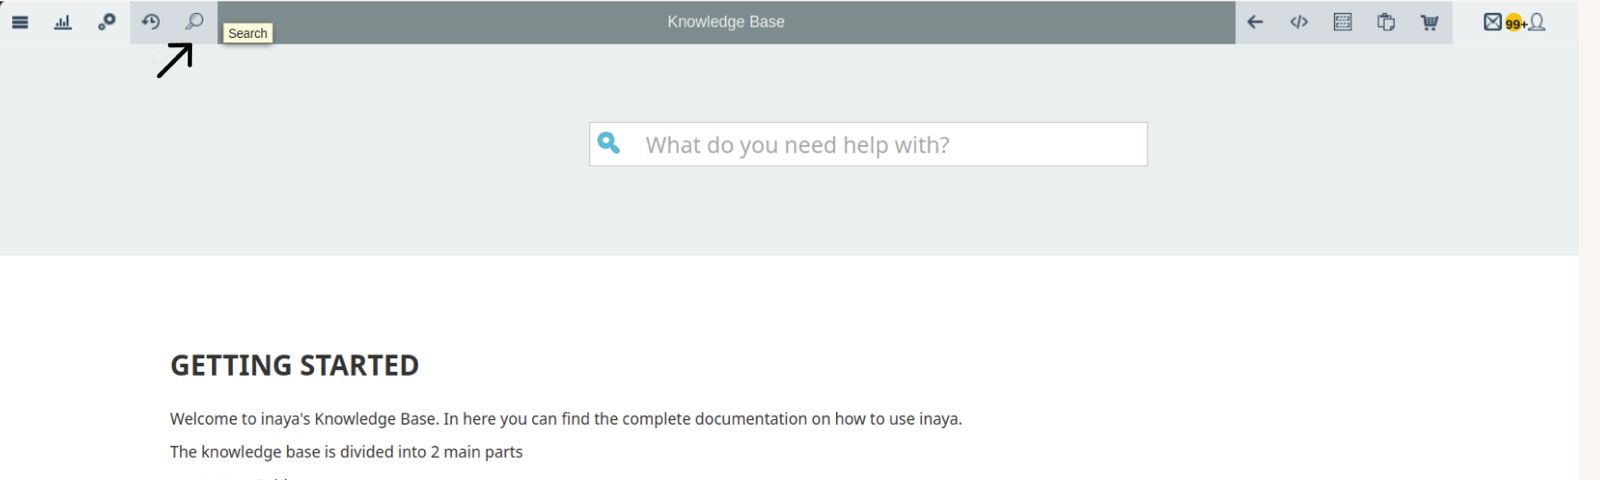
Find and select the item for which you want to configure the selling price.
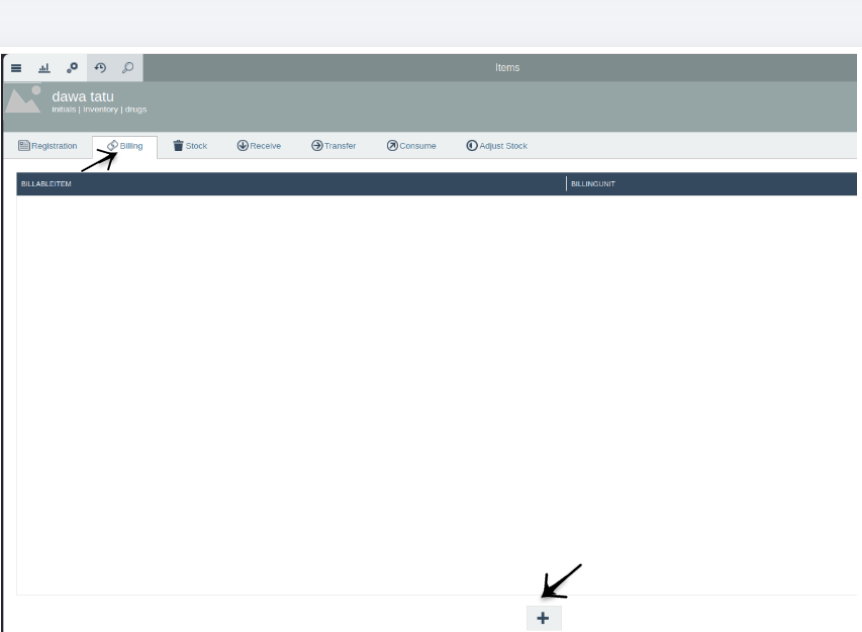
When the item details open, select the Billing panel next to the Registration panel.
Click the + (Plus) button at the bottom center of the Billing panel to start configuring the item's billing details.
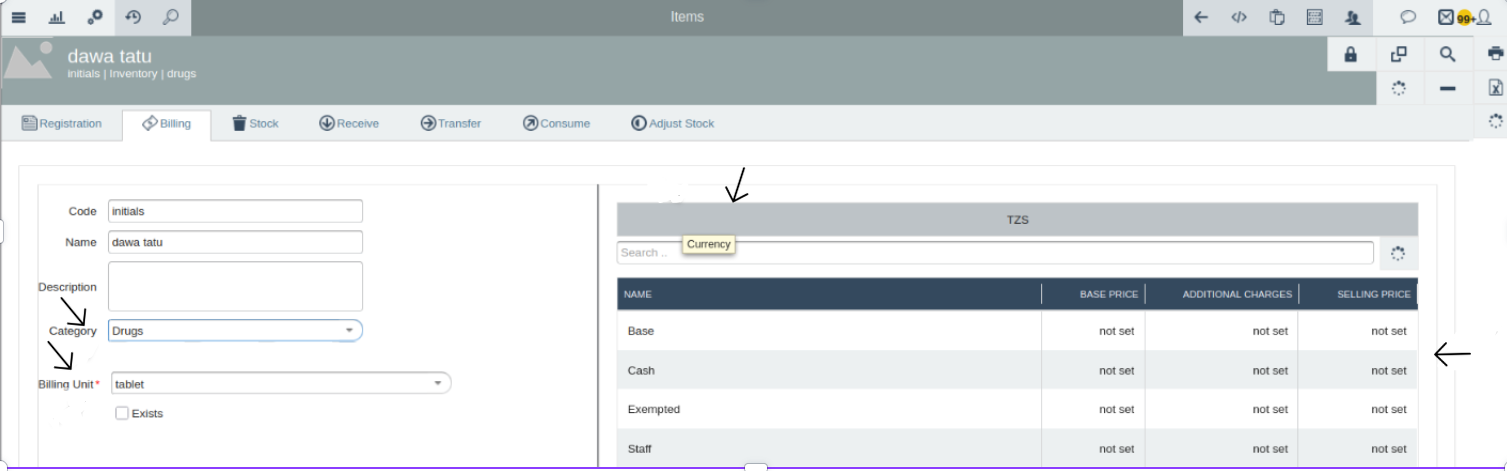
Review the item's Code and Name. These details are automatically taken from the information entered when the item was registered.
Under Category, click the dropdown and select the category assigned to the item during registration.
Under Billing Unit, click the dropdown and select the unit that will be used when selling the item.
On the right side of the panel, review the available Billing Categories. Above the Billing Categories, select the currency you want to use for the item's price.
For example, select TZS to set the price in Tanzanian Shillings or USD to set the price in US Dollars.
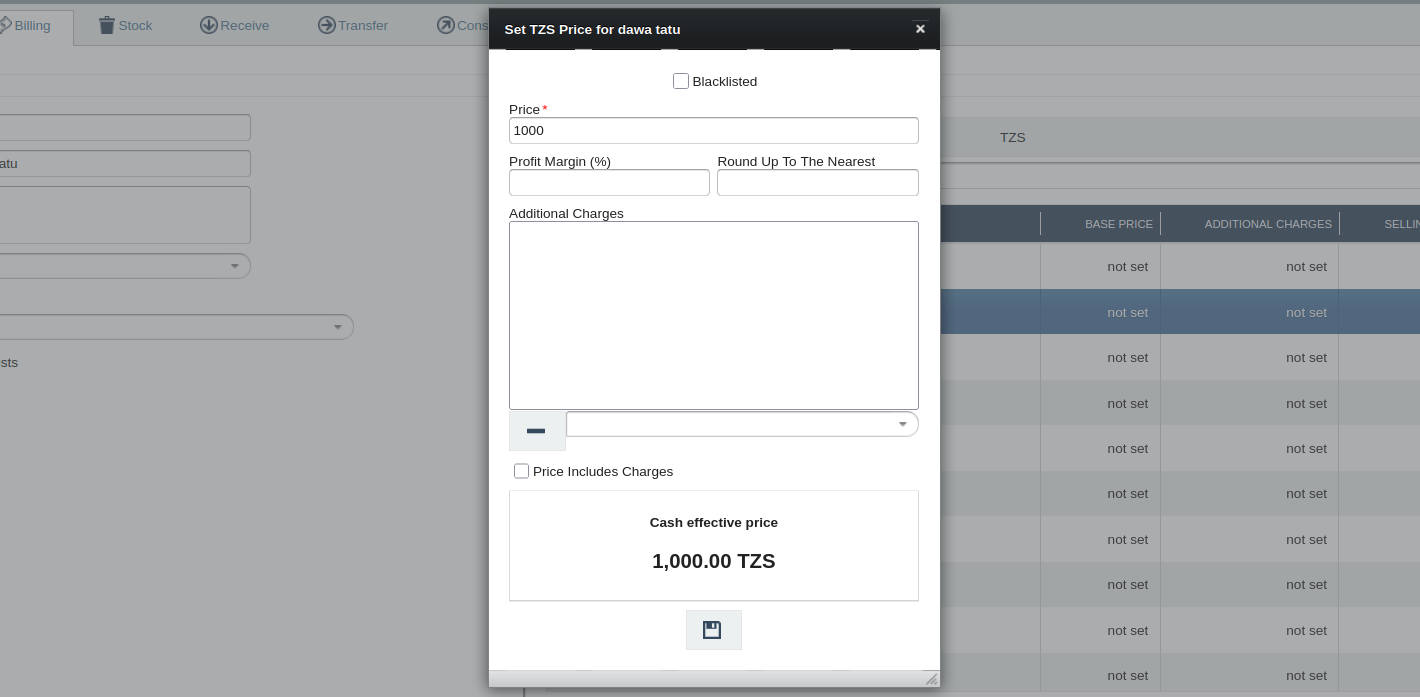
Select the Billing Category for which you want to configure the price. A box will open with fields for entering the item's price and other billing details.
In the Price field, enter the selling price of the item. This is a required field. For example, if one tablet is sold for TZS 100, enter
100as the price.In the Profit Margin field, enter the percentage you want to apply to the item. This field is optional.
In the Round up to the nearest field, enter the number of decimal places to which the price should be rounded. This field is optional.
Under Additional Charges, click the dropdown and select any additional charge you want to apply, such as VAT. This field is optional.
If you want the configured charges to be included in the final price, select the Price Include Charges checkbox.
Repeat the same process for other Billing Categories if you want to configure different prices or billing details for them.
After entering the required billing details, click Save to save the configuration.
Verify the result: confirm that the item's billing unit, selling price, and any selected billing details have been saved successfully.
6. What happens after saving
no | Change | Impact | Reaction |
|---|---|---|---|
1. | Price is configured for the item | The configured price will be displayed for each Billing Category selected for the item. | 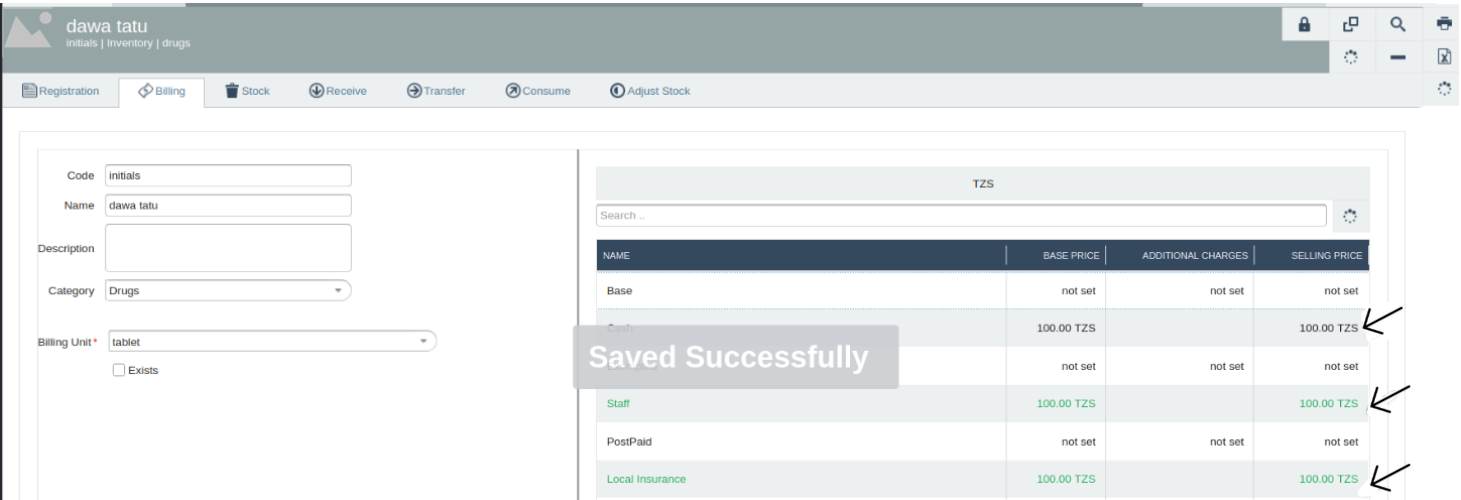 |
2. | Additional charges and profit margin are configured | The item's total price increases because the configured profit margin and additional charges are included in the final price. | 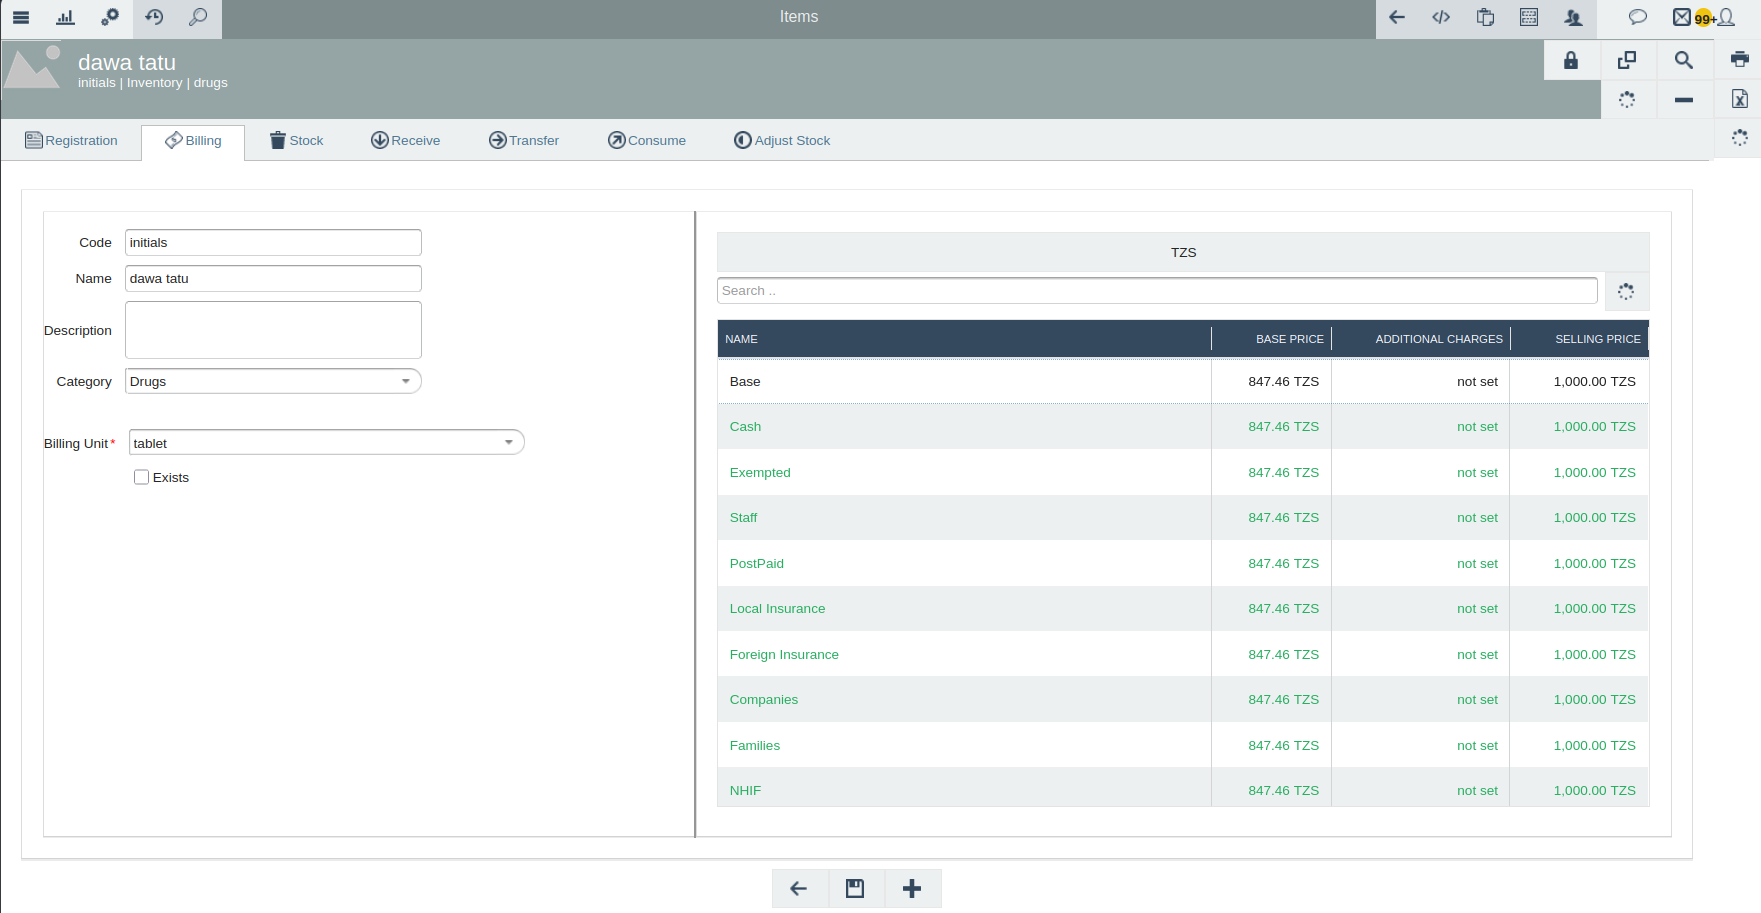 |
3. | Different prices are configured for different Billing Categories | Each Billing Category will use its own configured price when the item is sold. | 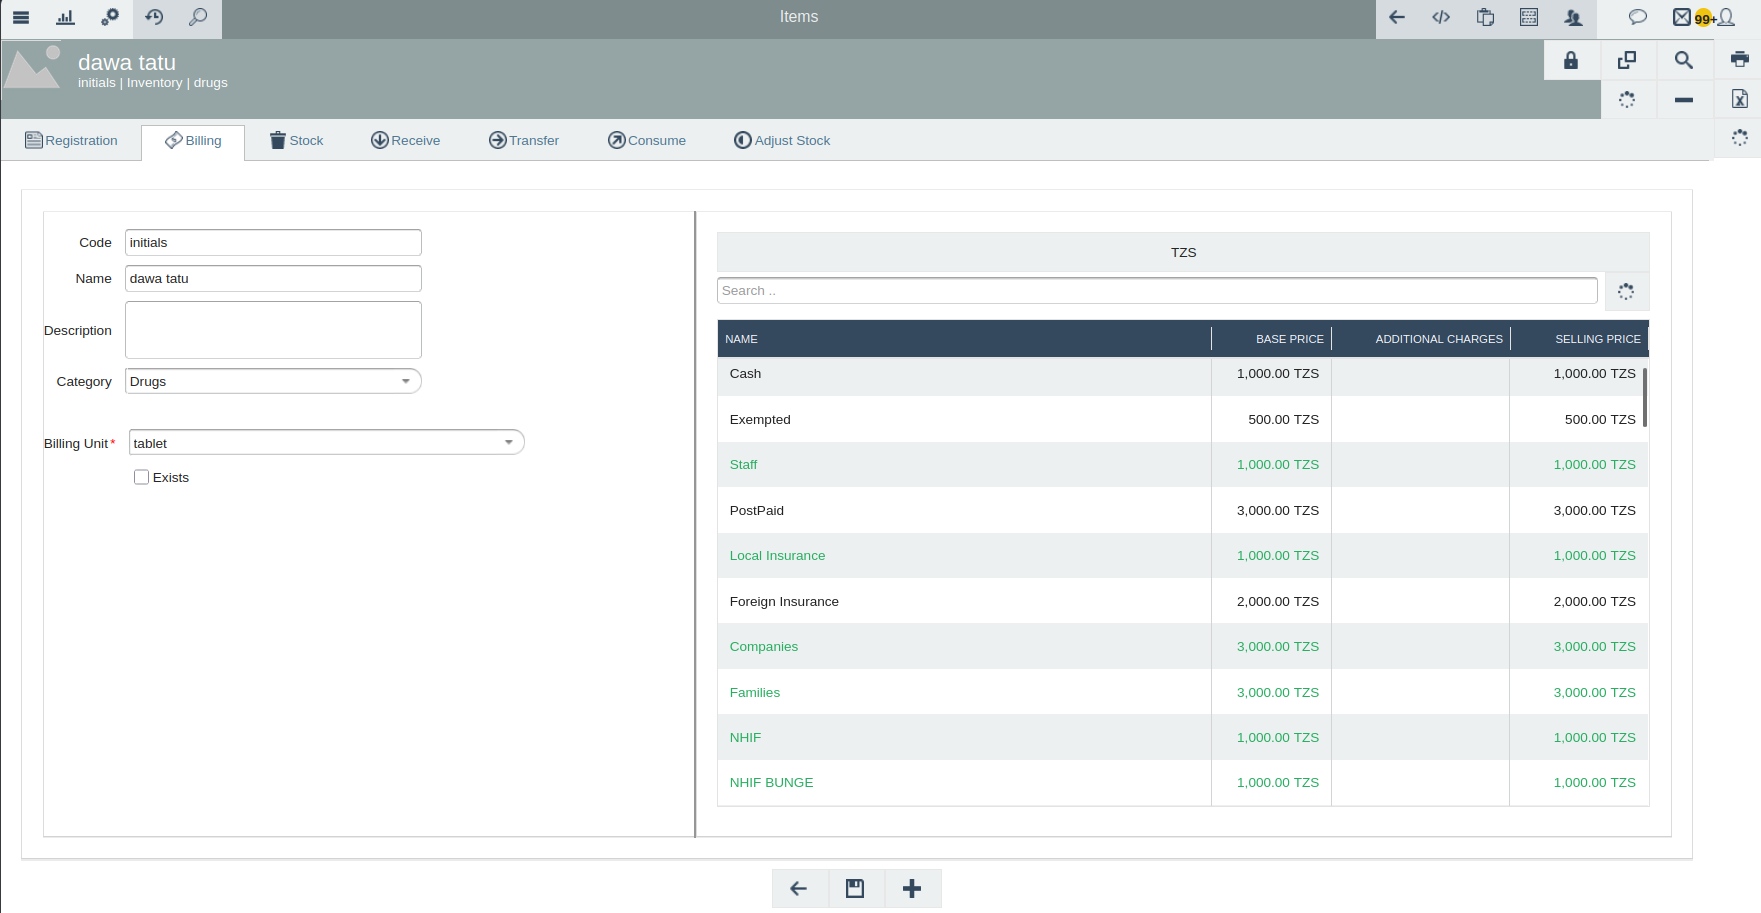 |
4. | Price Include Charges is selected | The applicable profit margin and additional charges are included in the item's final selling price. |
7. Configuration
Before registering an item, make sure the required billing categories, additional charges and currency are available. Follow the steps below to add them if they are not available or if you want to add more.
Add Additional Charges
To add a new additional charge follow this link to follow the step-by-step guide.
Add Billing Categories
To add a new billing category follow this link to follow the step-by-step guide.
Currency
To add a new currency follow this link to follow the step-by-step guide.
8. Troubleshooting
no | Problem | Solution | Reaction |
|---|---|---|---|
1. | Unable to save the price configuration because a required field such as Category or Billing Unit was left empty. | Review all the entered details and check which required field has been left empty. Select the missing Category or Billing Unit, then click Save again. | 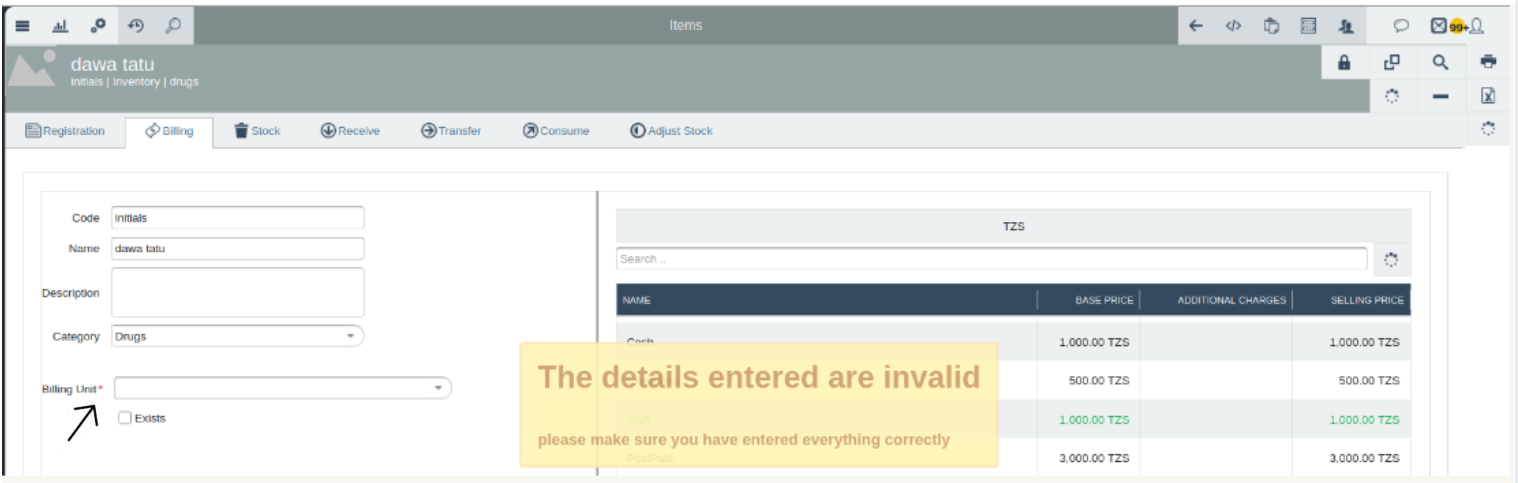 |