How to Change Stock Limit of an Existing Item
1. Overview
Stock Quantity Limits
Stock Quantity Limits define the minimum and maximum quantity of an item that should be maintained in a specific store.
These limits help prevent stock shortages and overstock situations by triggering notifications when the available quantity falls outside the defined range.
Stock Limit Management Flow
2. Why Are Stock Limits Important?
Stock limits provide a safety net for inventory management, ensuring the right quantity is always available without tying up excessive capital.
Benefit | Description |
|---|---|
Prevents Stockouts | Minimum limits trigger alerts before stock runs out in the notification |
Avoids Overstocking | Maximum limits prevent excessive purchasing and storage costs. |
Improves Replenishment | Clear thresholds guide purchase order generation. |
Audit Compliance | Documented limits support internal controls and inventory audits. |
Operational Efficiency | Reduces manual monitoring and emergency orders. |
Cost Control | Balances holding costs with service level requirements. |
3. Requirements to Change Stock Limits
Before you can set or update stock quantity limits, ensure the following requirements are met.
Requirement | Description |
|---|---|
Item Exists | The inventory item must already be created in Inaya. |
Store Presence | The item must be added to the target store. If not, add it first. |
Unit of Measurement | The unit (e.g., PCS, Bottle, KG) must be defined and match the inventory unit. |
Allow Quantity Limits | The Allow Quantity Limits flag must be enabled for the item-store combination. |
Min/Max Values | Meaningful minimum and maximum quantities must be determined. |
Authorisation | User must have permission to edit item master data and stock settings. |
Consumable Awareness | Understand whether the item is consumable (used without return) to set realistic limits. |
4. Scenarios and Examples
Scenario 1: First-Time Limit Setup
A newly registered item, "Surgical Masks (Box of 50)", is added to the Pharmacy Store. The pharmacist wants to maintain at least 10 boxes and never exceed 100 boxes.
Store: Pharmacy Store
Unit: Box
Minimum Quantity: 10
Maximum Quantity: 100
Scenario 2: Adjusting Limits Due to Seasonal Demand
During flu season, the consumption of masks doubles. The minimum is raised from 10 to 30 boxes, and the maximum from 100 to 200 boxes.
Updated Minimum: 30
Updated Maximum: 200
Scenario 3: Correcting an Overstock Limit
A warehouse has a maximum limit of 500 units for a slow-moving item, but storage space is limited. The maximum is reduced to 200 units to free up space.
Previous Maximum: 500
New Maximum: 200
Positive and Negative Adjustments
Stock limits are absolute values, not adjustments. However, changes can be expressed as increases or decreases:
Change | Meaning | Example |
|---|---|---|
Increase Min | Require more safety stock | Min changed from 5 to 10 (+5) |
Decrease Max | Reduce capacity threshold | Max changed from 200 to 150 (-50) |
5. Step-by-Step Guide
The process may involve two stages: (A) adding the item to a store if it is not already listed, and (B) enabling/updating quantity limits.
Part A: Add the Item to a Store (if not present)
When an item does not yet exist in the desired store, you must register it in that store’s stock before setting limits.
Step 1: Navigate to the Item
Go to Inventory → Items and open the target item.
Step 2: Access the Stock Section
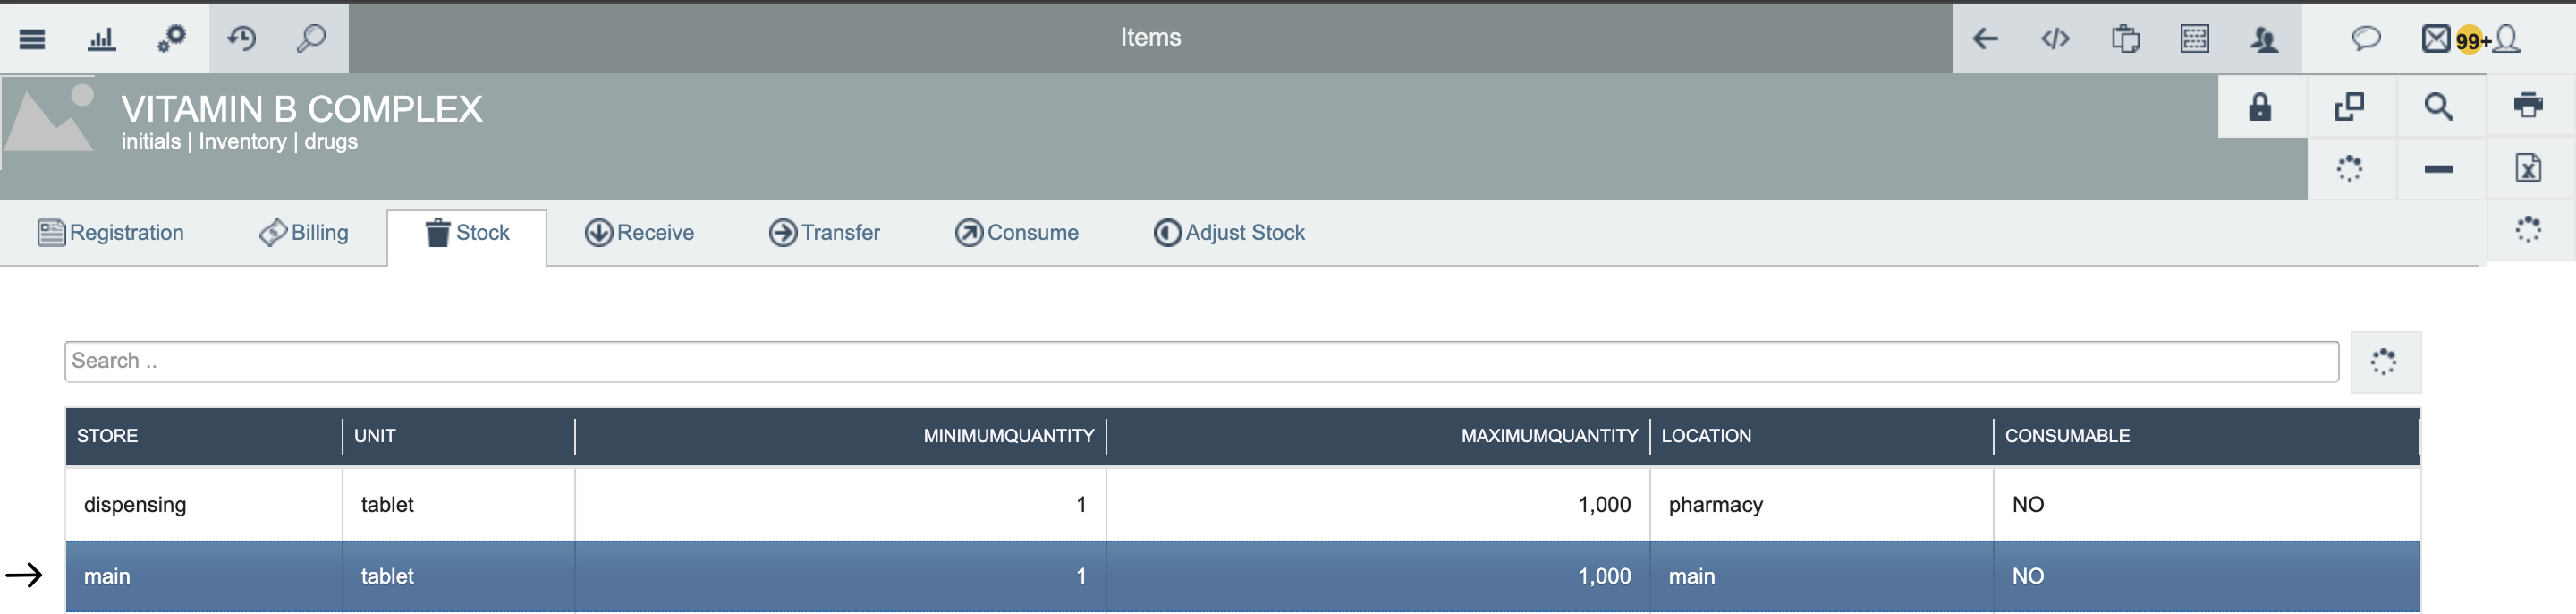
Scroll to the Stock section. A list of stores where the item is already added will be displayed.
Step 3: Add to a New Store
If the required store is not listed, click the plus (+) icon to add the item to stock.
Step 4: Fill in Store Details
Store: Select the target store (e.g., Main Warehouse, Pharmacy Store).
Unit of Measurement: Choose the correct unit (e.g., Pieces (PCS), Box, Bottle, Kilogram (KG), Liter (L), Pack).
Location: Specify the physical placement (e.g., Shelf A-01, Pharmacy Cabinet 3).
Consumable Flag: Mark whether the item is consumed during daily operations without return.
Step 5: Save
Save the new stock entry. The item will now appear in the store’s inventory.
Part B: Update Stock Quantity Limits
Once the item exists in the store, you can set or change its minimum and maximum thresholds.
Step 1: Open the Item for Editing
Navigate to Inventory → Items and select the target item. Click Edit.
Step 2: Enable Quantity Limits
If not already enabled, turn on Allow Quantity Limits.
Step 3: Select Store and Unit
In the limits configuration area, choose the Store and Unit of Measurement for which the limits will apply. The unit should match the item’s inventory unit.
Step 4: Update Minimum and Maximum Quantities
Enter the new values:
Minimum Quantity: The lowest stock level before a low-stock alert is triggered.
Maximum Quantity: The highest level before an overstock alert is triggered.
Example:

Step 5: Review and Save
Verify that the store, unit, and threshold values are correct. Click Save to apply the changes.
Step 6: Verify the Limits
After saving, navigate back to the item’s stock section or review the limit configuration to ensure the new thresholds are active.
The system will now use these limits to monitor stock levels and generate relevant notifications. ts removes the safety net. Only do so after confirming the item no longer requires threshold monitoring.
6. What Happens After Saving?
Once stock limits are saved, the system enforces them for inventory monitoring.
Event | What Happens |
|---|---|
Limits Applied | The item’s stock in the selected store is now governed by the min/max values. |
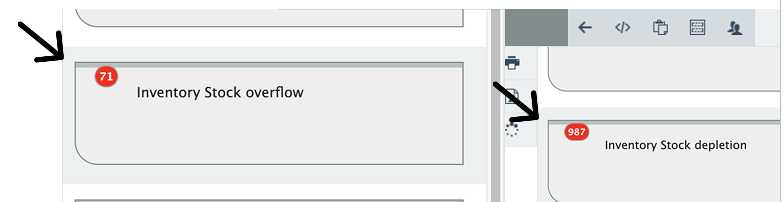
Low-Stock Alert | When stock falls to or below the minimum, a notification is triggered. |
Overstock Alert | When stock reaches or exceeds the maximum, an alert can be generated. |
Requisition Impact | Purchase requisitions may be suggested based on the min/max range. |
Audit Trail | The change is recorded with timestamp, user, old and new values. |
Report Integration | Updated limits appear in inventory threshold reports and dashboards. |
Example
Before update: Min 0, Max 0 (limits disabled)
After setting: Min 10, Max 100
System behavior:
Stock drops to 10 → low-stock warning.
Stock rises to 100 → overstock warning.
7. Configurations
Several configurations influence stock limit behavior.
Configuration | Recommendation |
|---|---|
Item Master | Ensure the item is active and correctly classified. |
Store Setup | Stores must be properly configured and visible in the item's stock section. |
Unit of Measure | Unit must be consistent with purchasing and inventory tracking. |
Consumable Flag | Mark correctly to align limit logic with consumption patterns. |
Allow Quantity Limits | Must be enabled per item-store to activate threshold monitoring. |
Min/Max Values | Set based on average consumption, lead time, and safety stock. |
User Permissions | Restrict limit changes to inventory managers or authorised personnel. |
Notification Channels | Configure alerts (email, in-app) for low-stock and overstock events. |
Stock Threshold Example Configuration
Field | Example Value |
|---|---|
Item | Surgical Gloves (Box) |
Store | Main Warehouse |
Unit | Box |
Consumable | Yes |
Allow Quantity Limits | Enabled |
Minimum Quantity | 20 |
Maximum Quantity | 200 |
8. Common Problems and Solutions
No. | Problem | Possible Cause | Solution |
|---|---|---|---|
1 | Limits cannot be enabled | Item not added to store | First add the item to the store (Part A). |
2 | Wrong unit selected | Unit mismatch with inventory tracking | Select the unit that matches how the item is counted in stock. |
3 | Minimum is set higher than maximum | Data entry error | Ensure Min < Max. |
4 | Low-stock alert not triggering | Minimum is set to 0 or below current stock | Verify the minimum value and current stock level. |
5 | Overstock alert fires constantly | Maximum is too low for normal ordering cycles | Increase the maximum to accommodate regular replenishment quantities. |
6 | Limits applied to wrong store | Multiple stores configured | Confirm the correct store is selected in the limits configuration. |
7 | Consumable flag incorrectly set | Item returns/repairs not considered | Update the flag based on operational reality. |
8 | Changes not saved due to permission | User lacks edit rights | Contact administrator to grant item modification permissions. |
9 | Limits not appearing in reports | Report filters or data refresh delay | Check the report parameters and wait for data sync (or refresh manually). |
9. Best Practices
1. Base Limits on Data
Use historical consumption, lead time, and demand forecasts to set realistic min/max values.
2. Differentiate by Store
The same item may need different thresholds in a busy clinic store vs. a slow-moving warehouse.
3. Mark Consumables Correctly
Consumable items (gloves, syringes) often need higher minimums; non-consumables may need different logic.
4. Review Regularly
Schedule quarterly reviews to align limits with changing operational needs.
5. Combine with Automated Replenishment
Link stock limits to purchase requisition rules to automate ordering.
6. Document the Reason for Changes
Add internal notes explaining why a threshold was modified (e.g., “flu season surge”).
7. Test Alert Triggers
After updating, verify that low-stock and overstock notifications work as expected.
8. Follow Authorisation Workflows
All limit changes should go through the inventory manager or designated approver, maintaining audit compliance.
Quick Reference
Step | Action |
|---|---|
1 | Navigate to Inventory → Items and open the item. |
2 | If item not in store: click + in Stock section, fill details, save. |
3 | Click Edit. |
4 | Enable Allow Quantity Limits. |
5 | Select the target Store and Unit. |
6 | Enter Minimum Quantity and Maximum Quantity. |
7 | Verify all values. |
8 | Click Save. |
9 | Confirm the updated limits in the item's stock view. |