How configure an inventory item
1. Overview
This user guide provides step-by-step instructions on how to completely configure an inventory item in Inaya. It guides users through the required setup, configuration process, and item management operations. The guide also helps users identify and resolve common issues that may occur while registering an item, ensuring that inventory items are properly, configured for inventory operations in Inaya.
2. Inventory Item Usage and its Importance
Configuring an inventory item in Inaya is the first step before starting any inventory operation or item-related activity. This is a core area where users register items before they can continue with other inventory processes. Proper item configuration helps users manage and track items correctly in different areas in the system. It also allows users to view all reports related to items and get a complete track of how items move and are used across different areas within Inaya.
3. Requirements to set
Before registering an inventory item in Inaya, make sure you have the required access to perform this activity. Ensure that your user role is assigned the permission to register items so that you can access the item registration area. Also, confirm that all required categories and units that will be used for your items are already configured in Inaya before starting the registration process.
4. Scenario and examples
This section provides common scenarios and examples to help you understand how to completely configure an inventory item and prepare it for use.
When you receive new items that have never been registered before, you need to register each item and add all the required details before using them in inventory activities.
Example: You receive Paracetamol, Amoxicillin, and vitamin C as new items, and none of them have been registered before. Register each item and add the required details before you can receive, transfer, or use them in inventory.
5. Step-by-Step Guide: Configuring an Inventory Item
Follow the steps below to completely configure an inventory item, from entering the item details to completing all the required settings.
Register a new item
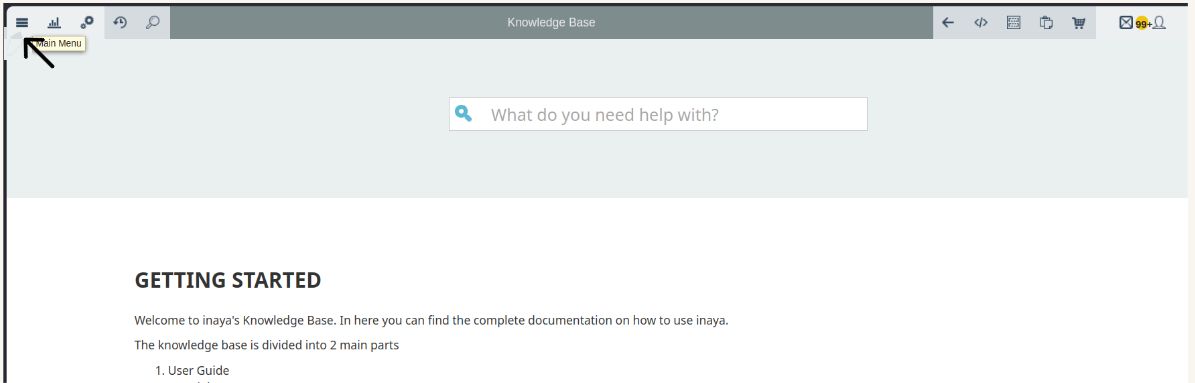
Log in to Inaya and open the Main Menu.
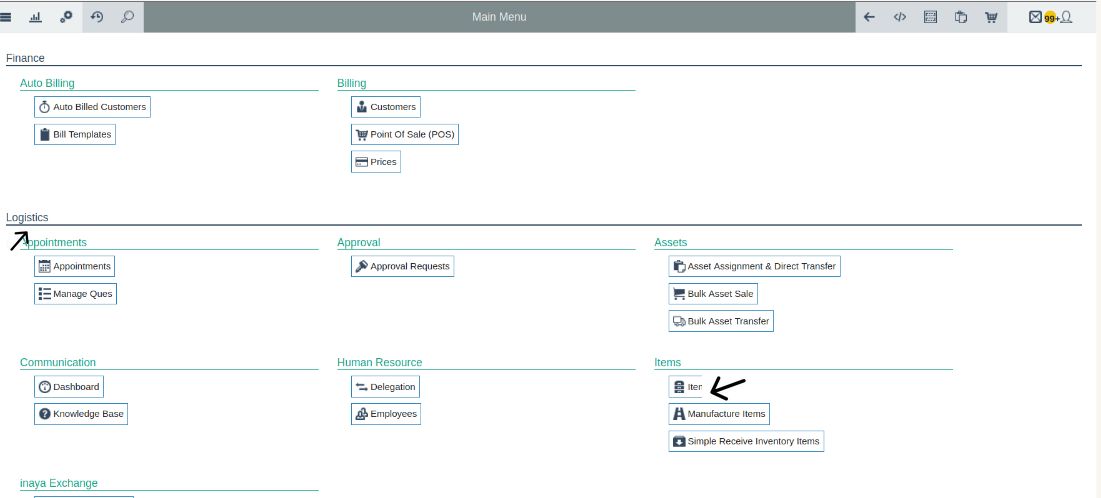
Scroll down to Logistics, then select Items to open the Items page.
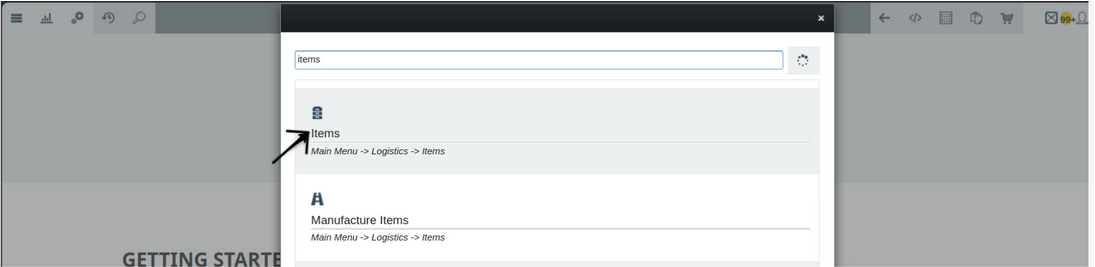
Alternatively, click the Search icon in the top-left corner, type
Itemsin the search box, and select Items from the search results.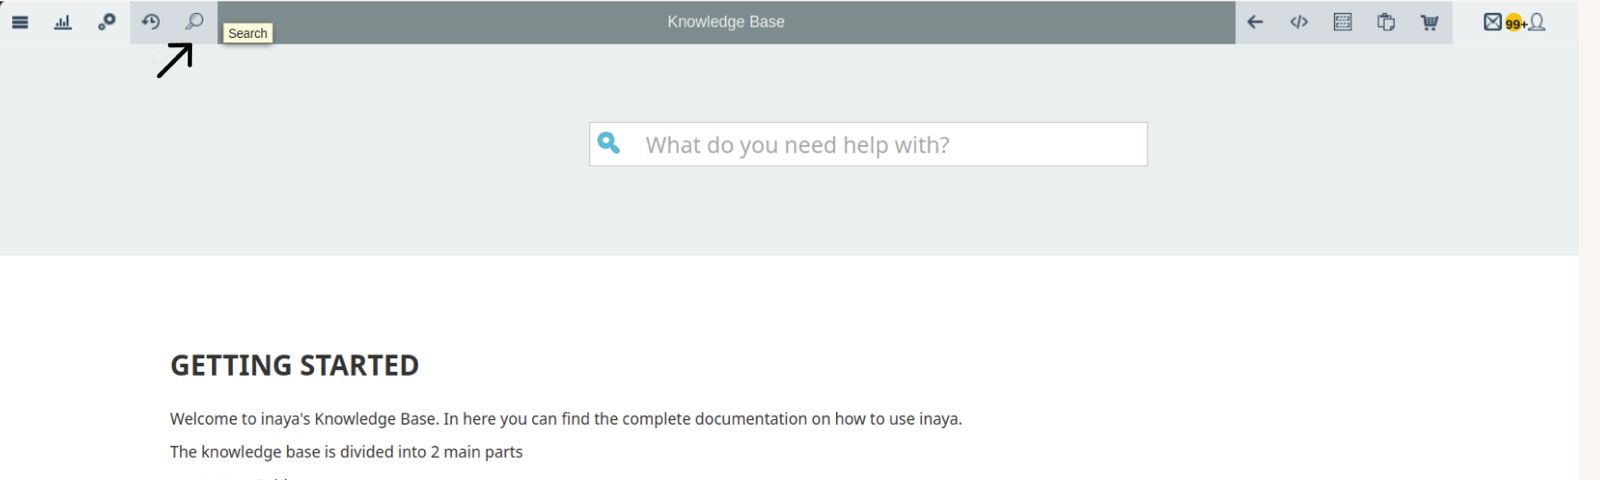
In the Items section, click the + (Plus) button to start registering a new item. The Registration section will open.
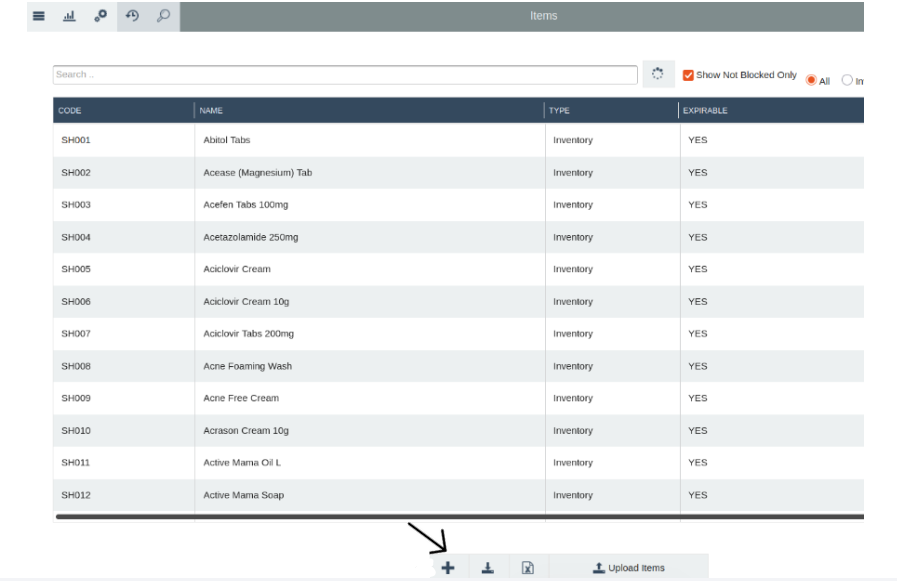
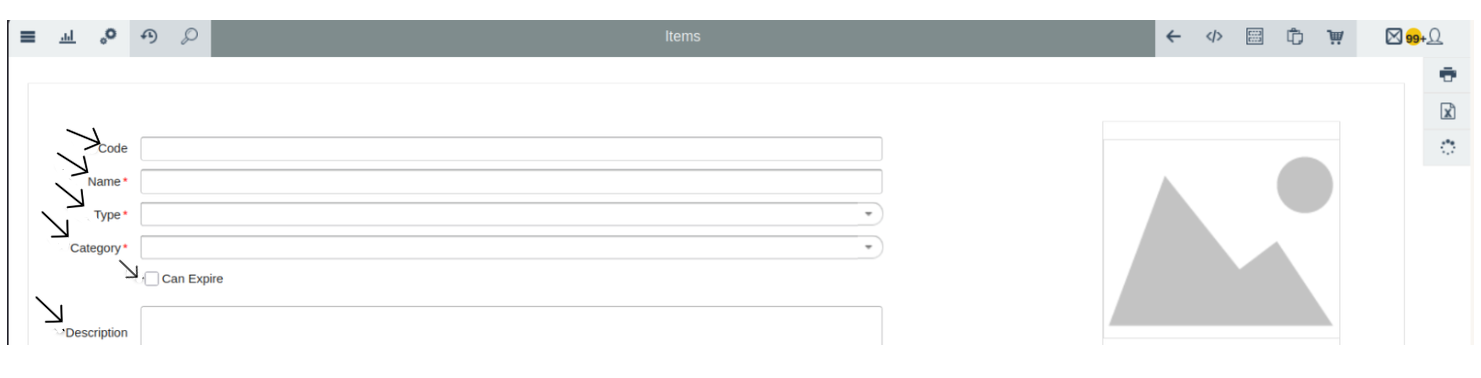
In the Registration section, enter the item details as follows:
Code: Enter a unique code that will identify the item.
Name: Enter the name of the item. Each item should have its own name.
Type: Click the dropdown and select Inventory for items that are sold or kept as stock.
Category: Click the dropdown and select the appropriate category for the item.
About to Expire Reminder Days: Enable the field by selecting the checkbox, then enter the number of days before the expiry date when you want to receive a reminder. Use this field only for items that have an expiry date.
Description: Enter any additional information about the item. This field is optional and can be left empty if there is no additional information.
Under Item Units, select the unit that will be used to manage the item. For example, select Tablets, Boxes, or Bottles, depending on how the item is managed.
Under Display Units, select the unit you want to display for the item. This can be the same unit selected under Item Units.
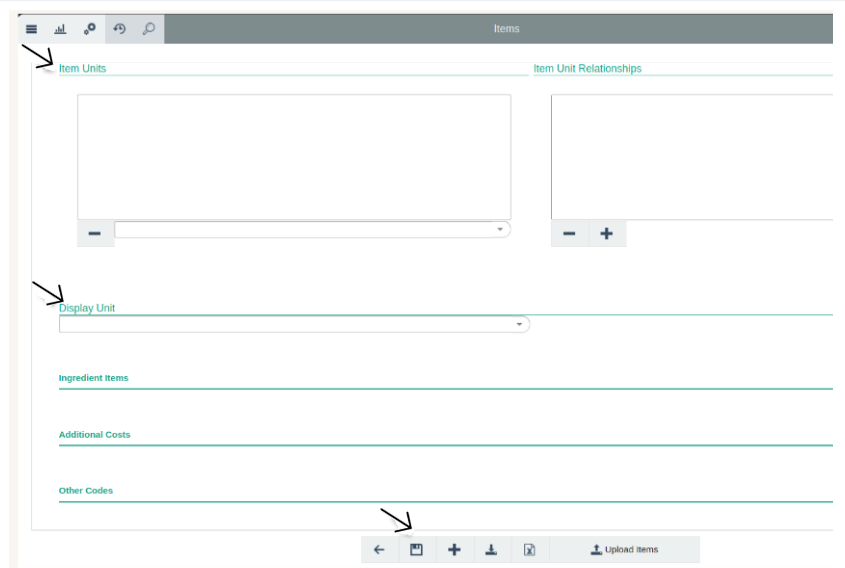
After entering all the required details, click the Save button at the bottom center of the panel.
Verify the result: confirm that the item has been successfully registered and is available for further configuration and inventory activities.
6. What Happens After Saving?
change | impact | Reaction | |
|---|---|---|---|
1. | The item is registered | The item is successfully registered and added to the system. | 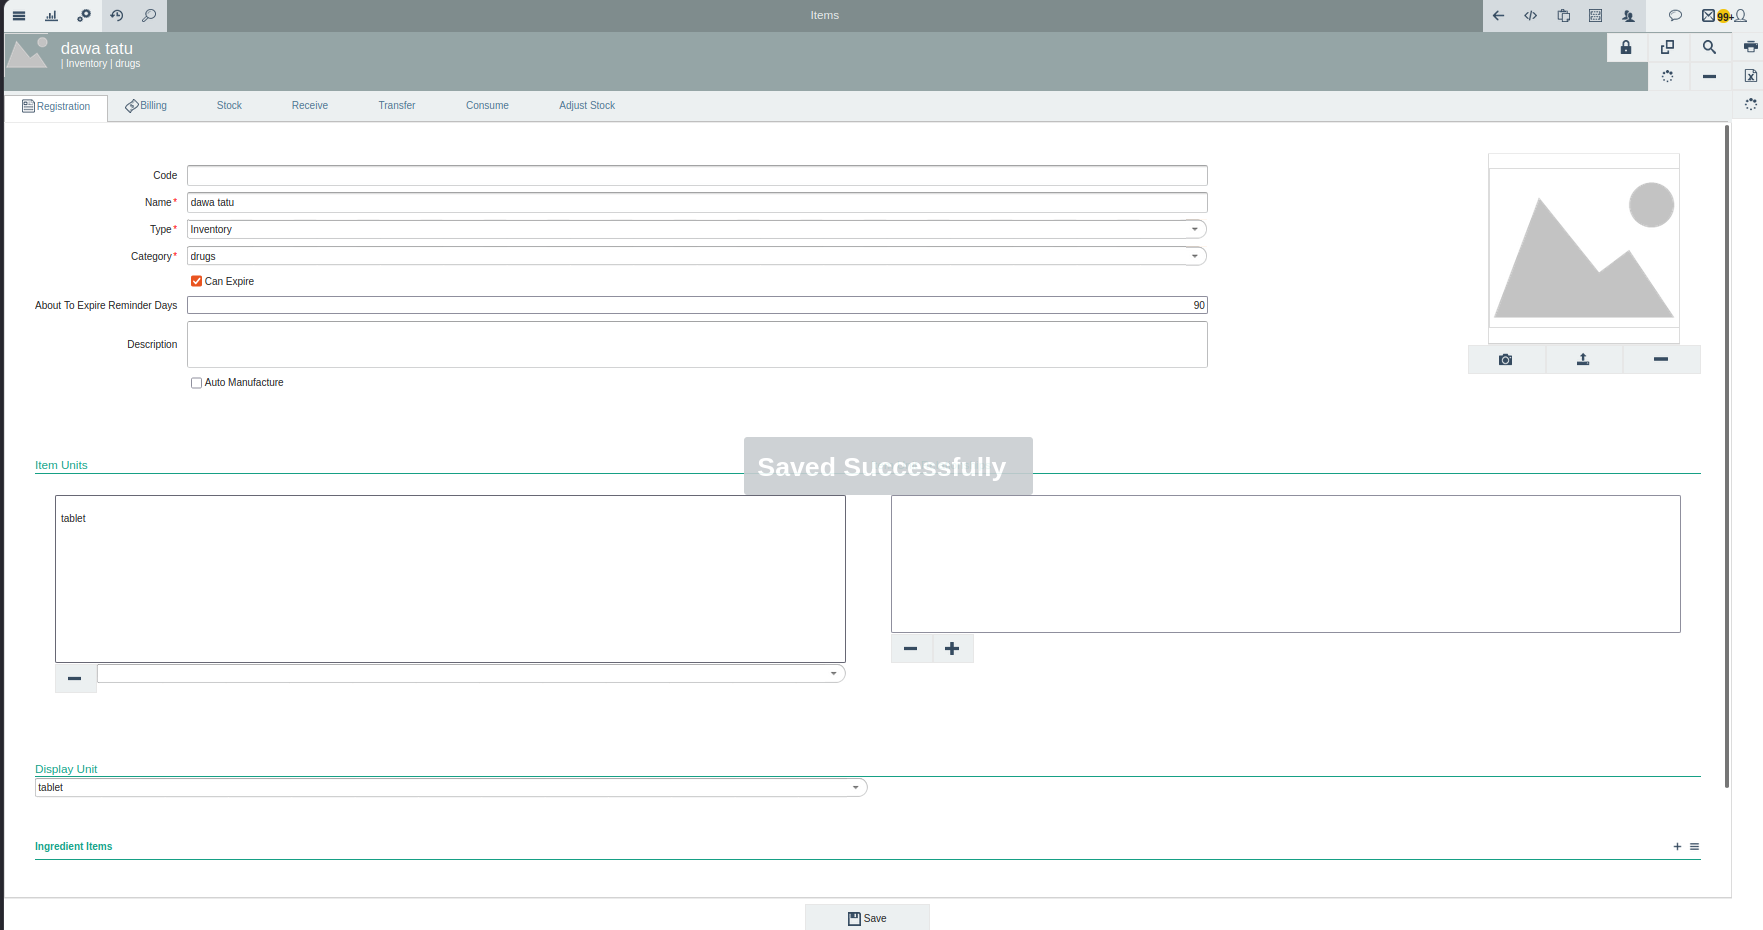 |
2. | The item appears in the Item list | When you open the Item section, you will see the registered item listed with its Code, Name, Type, Category, and expiry information where applicable. | 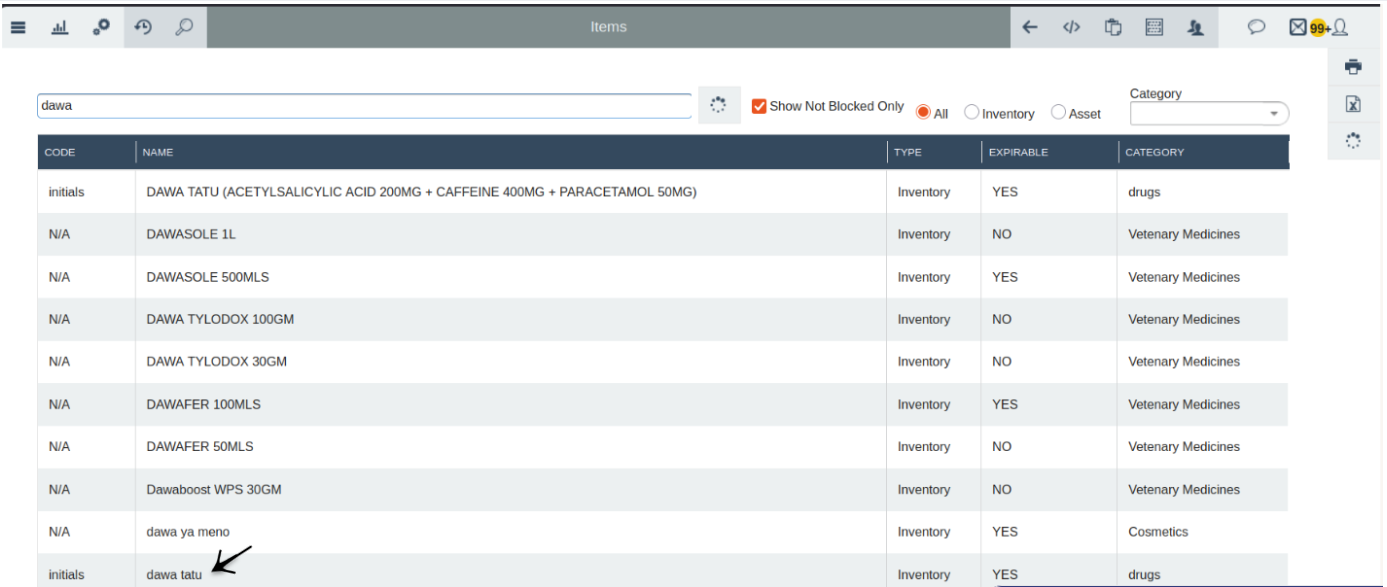 |
7. Configuration
Before registering an item, make sure the required Units and Categories are available. Follow the steps below to add them if they are not available.
Step 1: Add a New Unit
To add a new category follow this link Items to follow the step-by-step guide.
Step 2: Add a New Category
To add a new category follow this link Items to follow the step-by-step guide.
8. Troubleshooting
problem | solution | Reaction | |
|---|---|---|---|
1. | Registering items with the same name | Make sure each item has a clear and unique name that helps you identify it correctly. | 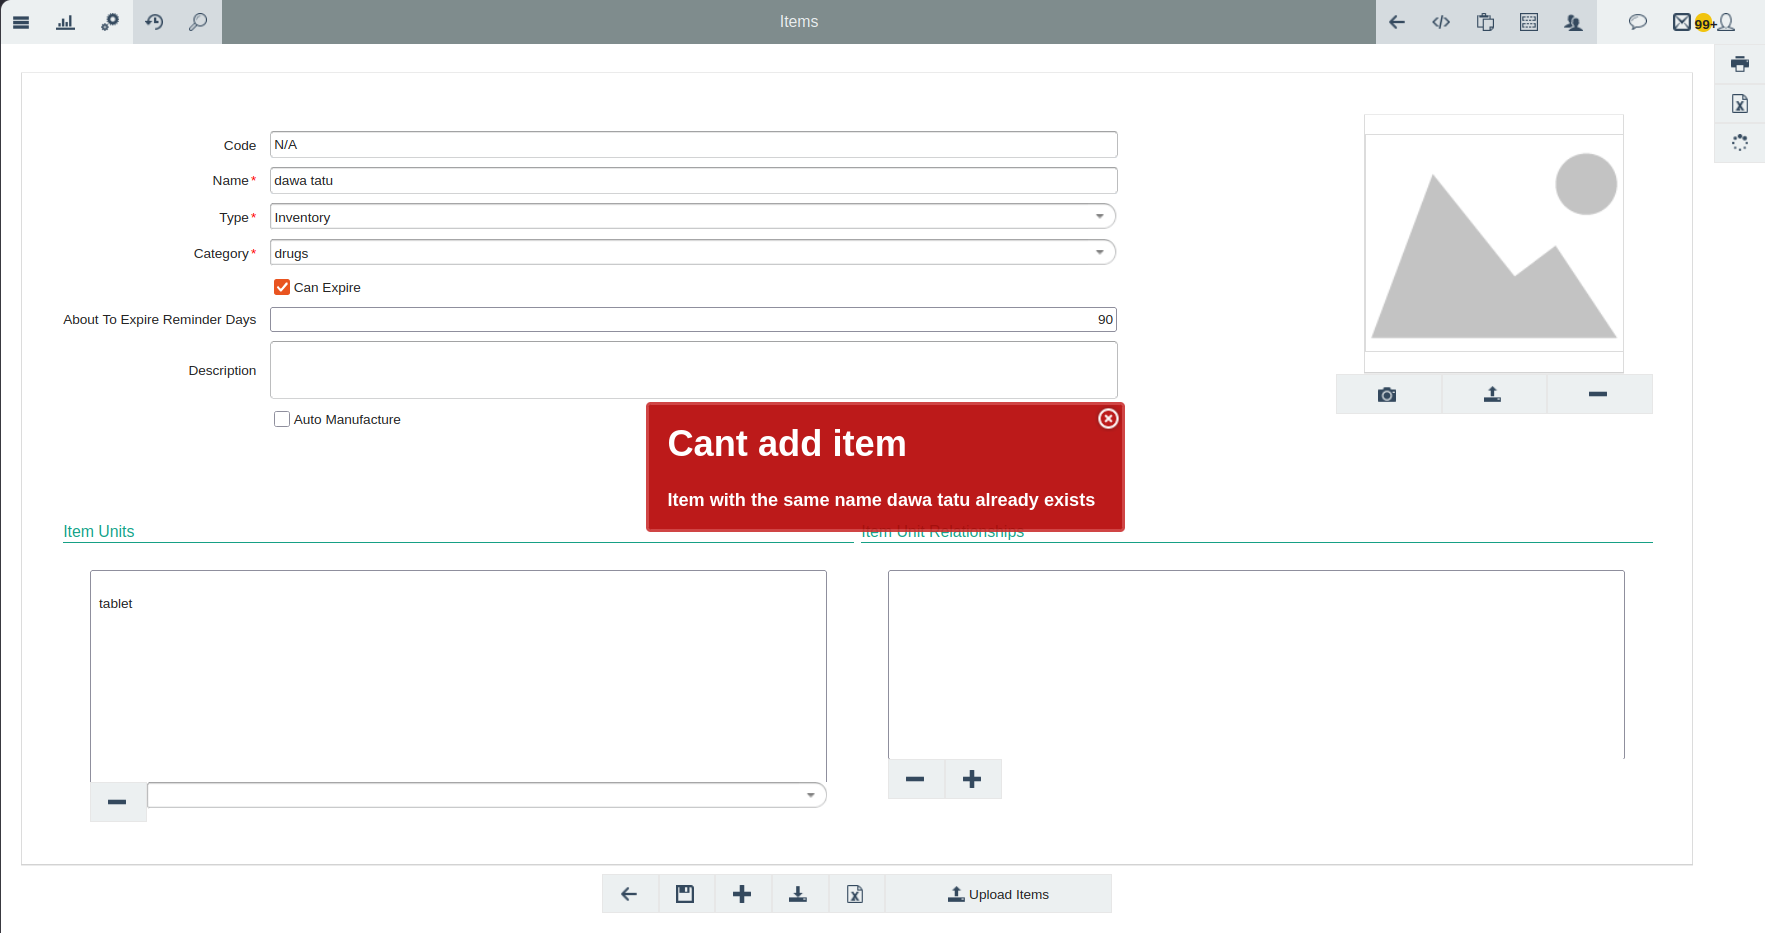 |
2. | A required field is left empty | Check the fields marked with a red asterisk (*). Fill in all required fields before clicking Save | 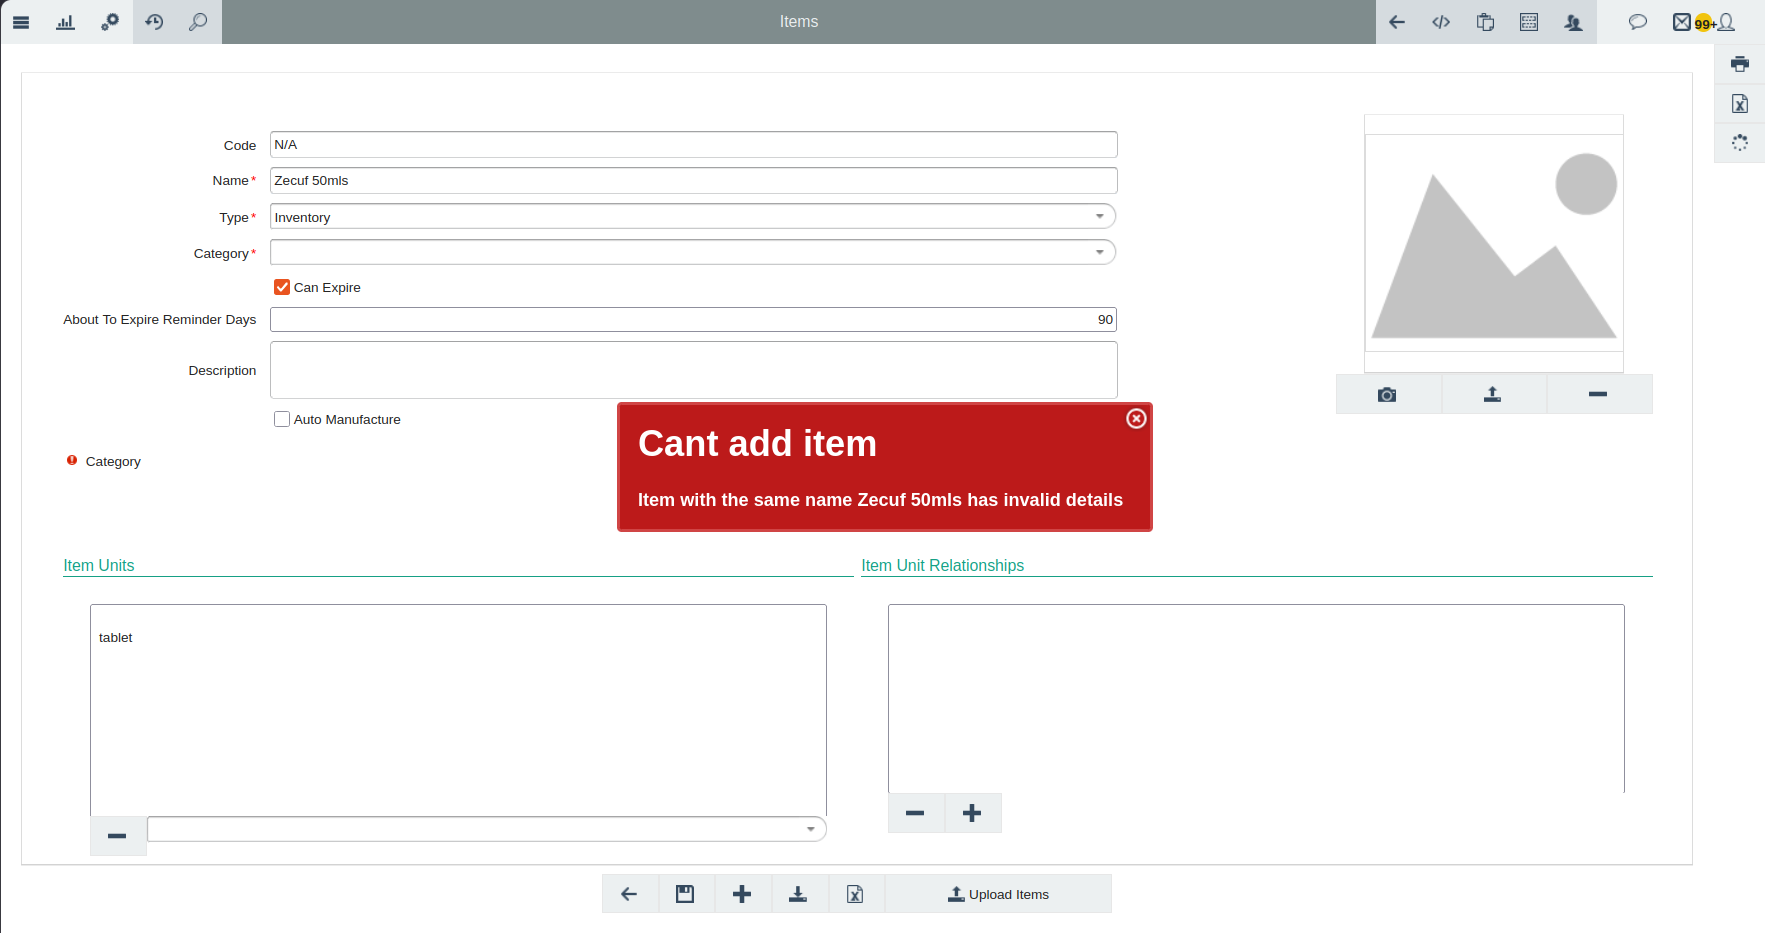 |