How to Receive Goods from Purchase Order
1. Overview
The Goods Receiving process is used to record goods delivered against an approved Purchase Order.
After a Purchase Order has been approved and the vendor delivers the items, the receiving user records the actual items received, including:
Store
Batch
Quantity
Expiry date
Other required receiving information
The receiving process ensures that the physical goods delivered by the vendor are correctly recorded in Inaya and, where Procurement–Inventory integration is enabled, added to the selected store's inventory.
2. Why Is Receiving Purchase order Important?
Goods receiving confirms that the goods ordered from the vendor have actually been delivered.
It helps to:
Confirm delivery against the Purchase Order.
Record the actual quantity received.
Track batches and expiry dates.
Update store inventory.
Identify shortages or excess deliveries.
Maintain accurate procurement records.
Provide traceability between the Purchase Order and inventory.
3. Requirements to Receive Goods from purchase order
Before receiving goods, ensure that:
The Purchase Order has been approved or passed without approval.
The vendor has delivered the goods
The correct Purchase Order is available.
The receiving store is known.
The items delivered can be identified.
Batch numbers are available where batch tracking is required.
Expiry dates are available for applicable products.
The user has permission to receive goods.
Required inspection has been completed where inspection is configured.
4. Step-by-Step Guide
Navigate to
Step 1: Open purchase → Purchase order
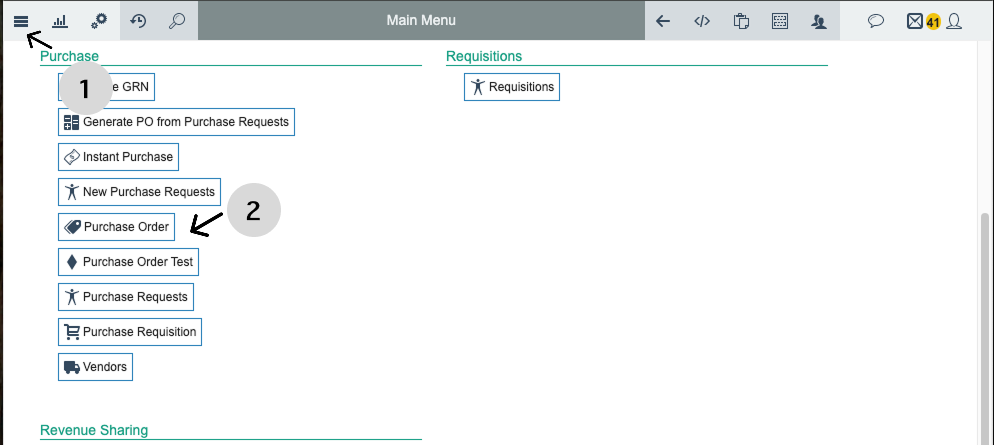
Purchase order → Select purchase order with status waiting for delivery and tap it to open

Step 2: Select receive in 1 followed by tap the item you want ro receive in 2
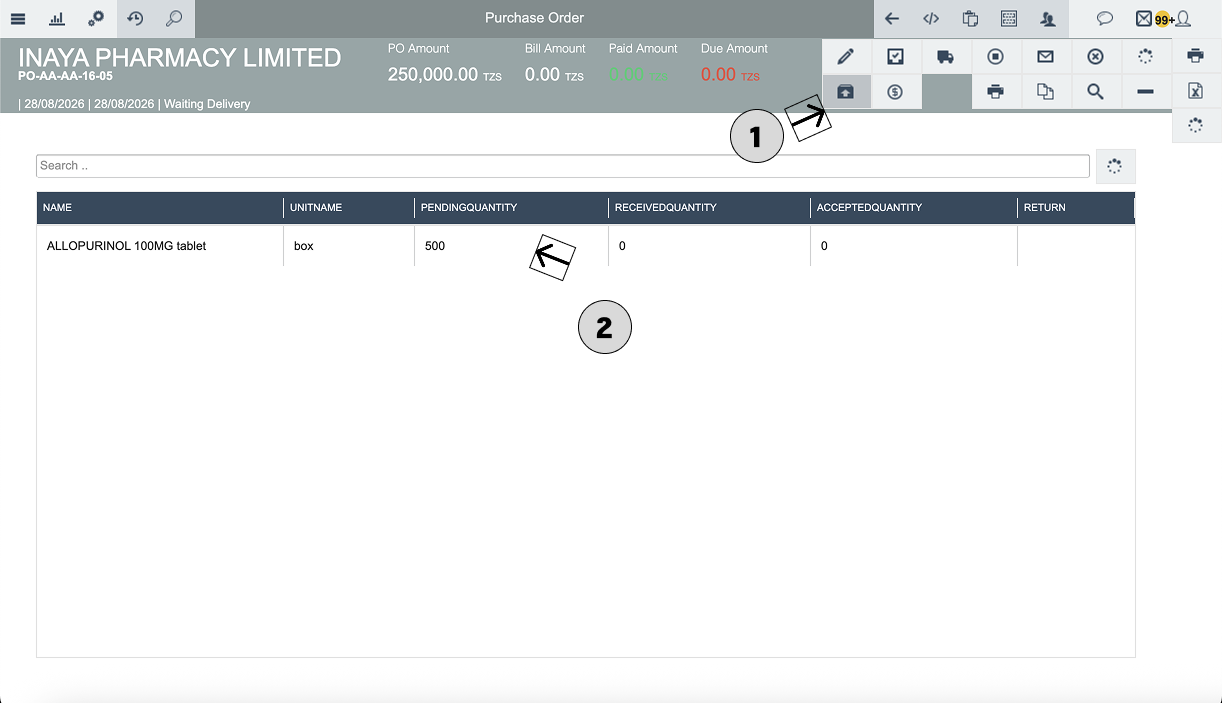
Step 3: Select the Purchase Order item to open it
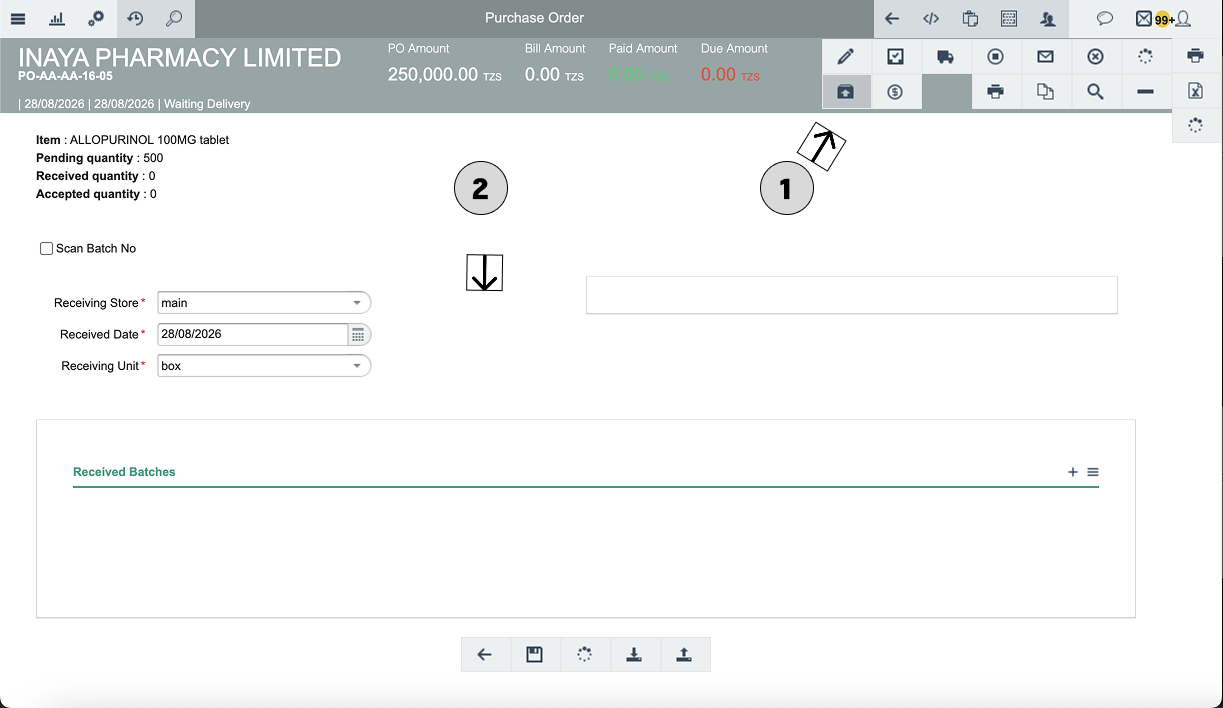
Step 4: Select the Store
Select the store where the delivered goods will be received as well as unit.
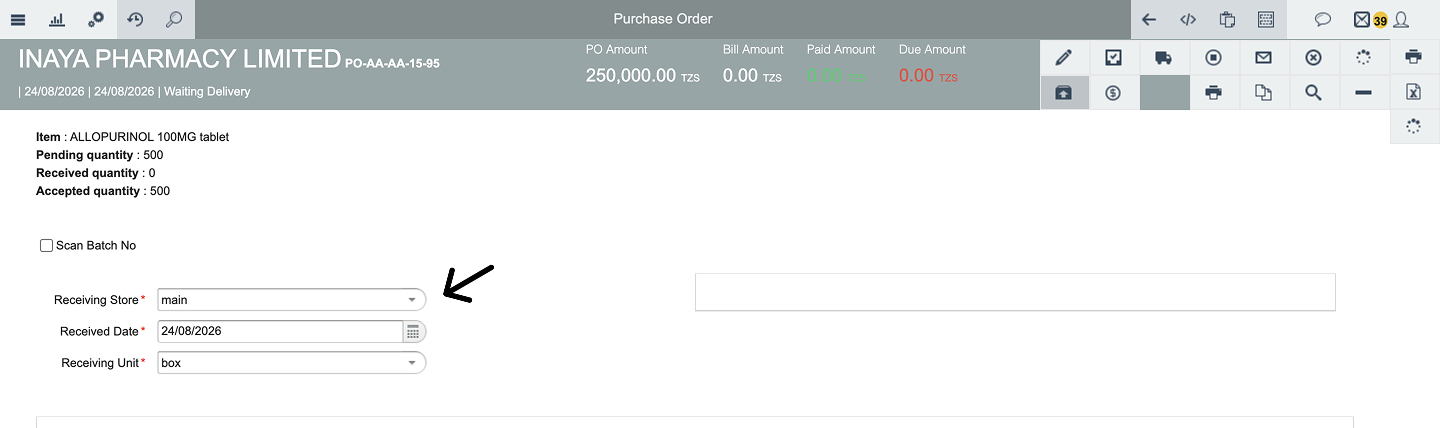
Step 5: Use the Plus (+) Icon
On the receiving screen, use the plus (+) icon on the right side of the item to add the receiving details.
The plus action is used to enter information for the batch being received.

Step 6: Add the Batch
Enter the batch number printed on the physical product.
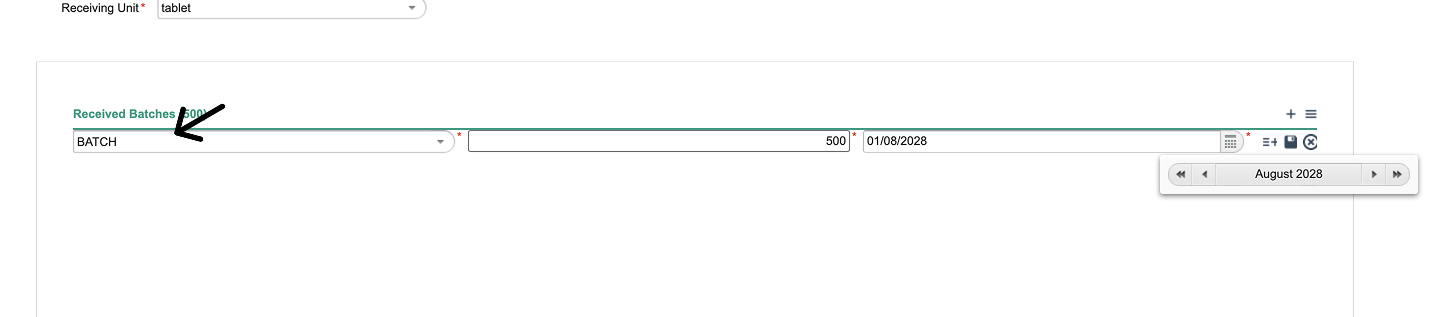
If the same item is delivered in multiple batches, add each batch separately.
Multiple Batch Example
Item | Batch | Quantity | Total Received |
|---|---|---|---|
ALLOPURINOL 100MG | Batch A | 300 Boxes | |
ALLOPURINOL 100MG | Batch B | 200 Boxes | |
ALLOPURINOL 100MG | Total | 500 Boxes | 500 Boxes |
Step 7: Enter the Quantity
Enter the actual quantity physically received for that batch.
Example:
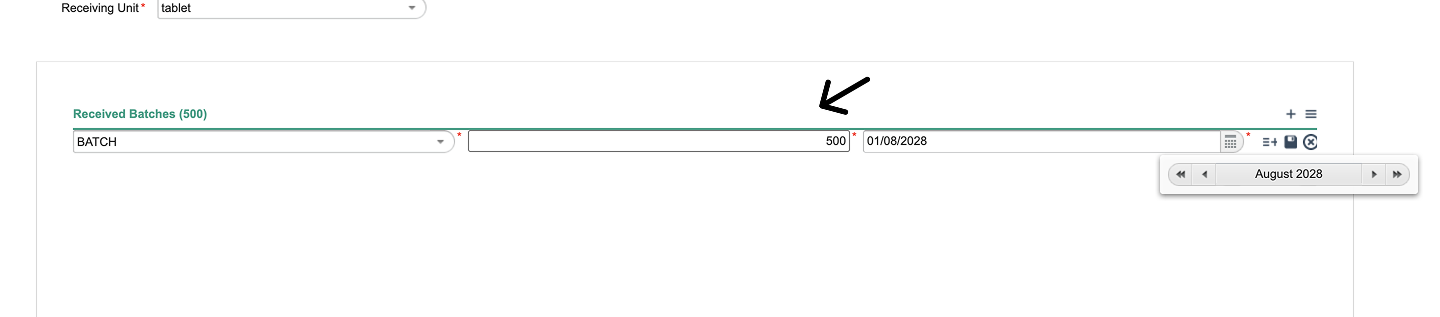
The receiving quantity should match the physical quantity delivered.
Step 8: Enter the Expiry Date
Enter the expiry date shown on the physical product.
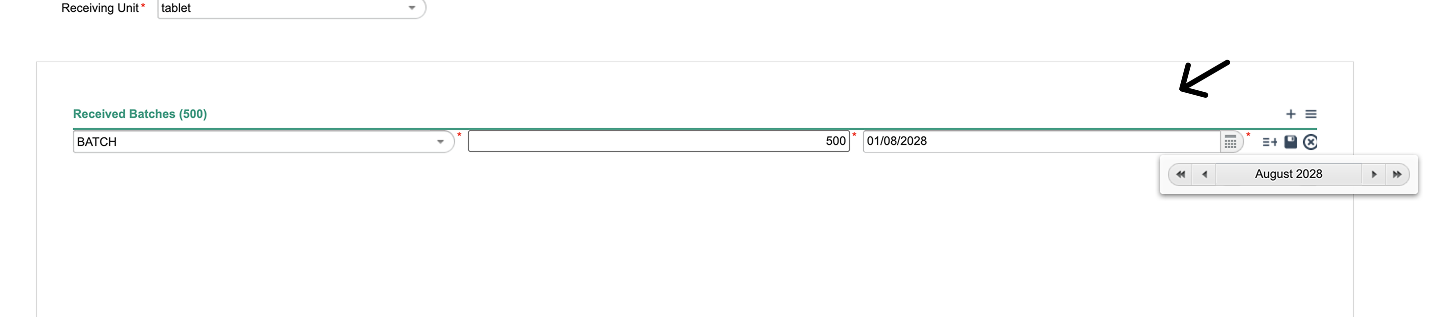
Do not guess the expiry date. Verify it directly from the product packaging.
Step 9: Save the Batch
Save the batch information.
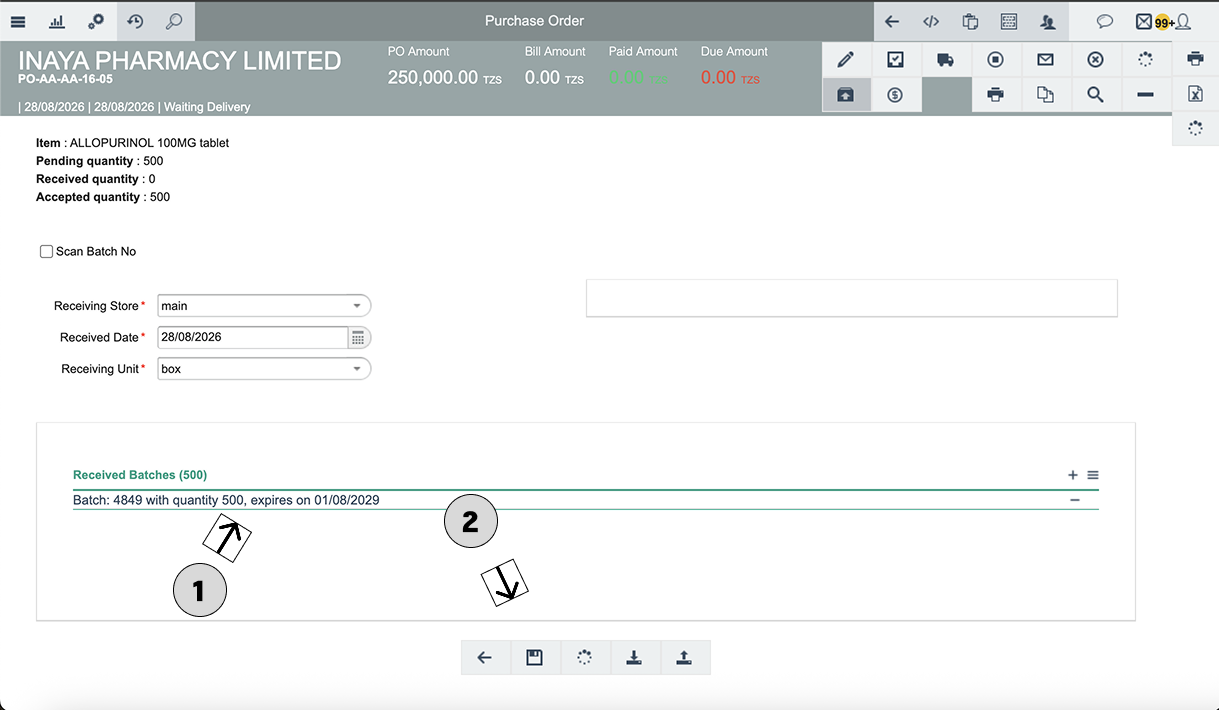
Step 10: Review All Received Items
After adding the batch information, review the receiving document which later we will confirm in 2.
Check:
Item
Batch
Quantity
Expiry date
Store
Total received quantity
Make sure the recorded quantities match the physical delivery.
Step 11: Confirm the Entire Receiving
After all items and batches have been entered and saved, Confirm the complete receiving transaction.
This final confirmation records the Purchase Order receiving.
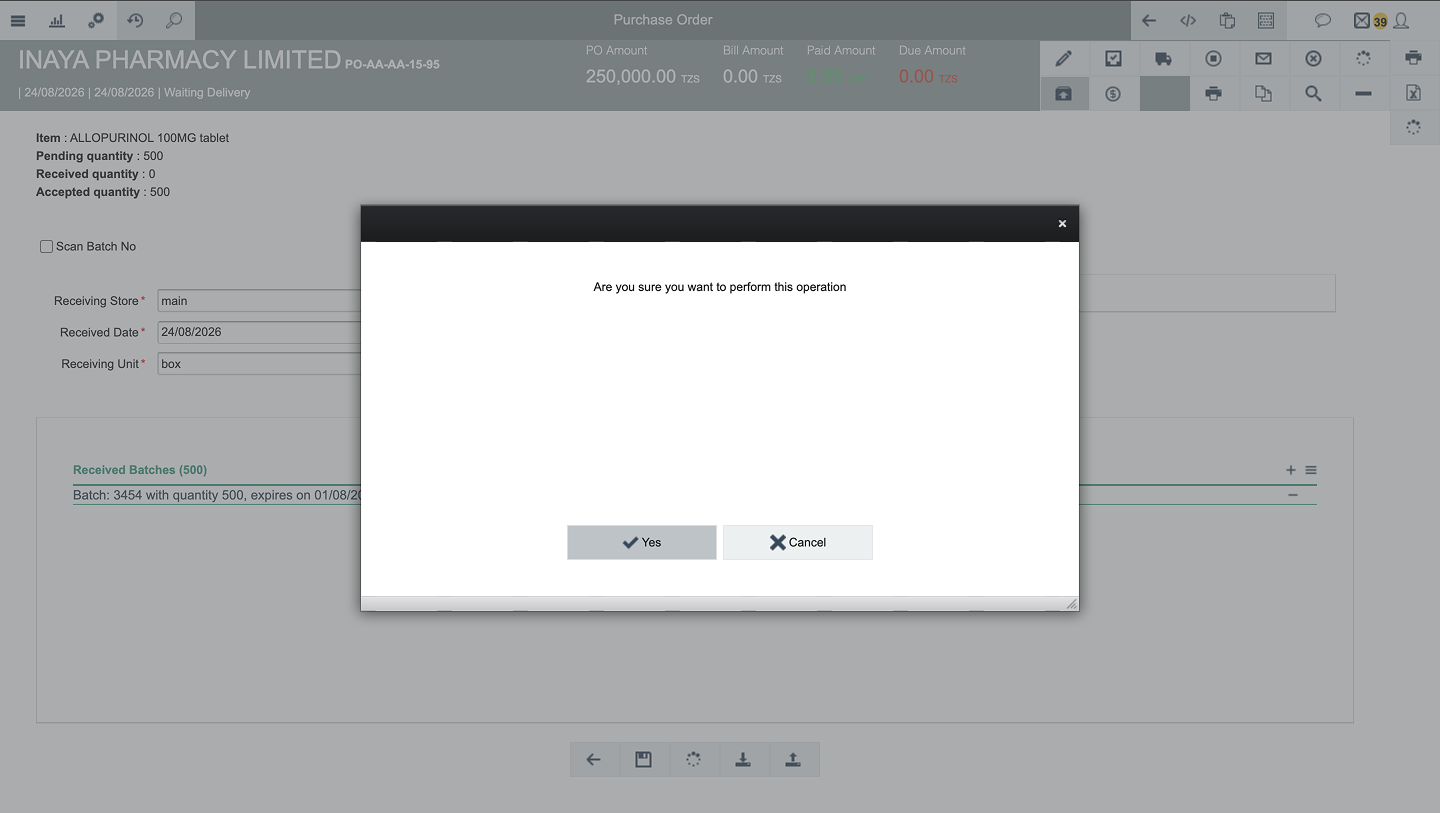
6. What Happens After Confirming the Receiving?
Once the receiving is confirmed, Inaya records the received quantities against the Purchase Order.
For the example:

The Purchase Order can show:
Completely Delivered
where the full ordered quantity has been received and accepted.

7. Receiving Multiple Batches
An item may arrive in more than one batch.
For example:
Item | Batch | Quantity | Expiry Date |
|---|---|---|---|
ALLOPURINOL 100MG | ALLOP001 | 300 Boxes | 06/2028 |
ALLOPURINOL 100MG | ALLOP002 | 200 Boxes | 08/2028 |
Total | 500 Boxes |
Each batch should be added separately using the + icon.
9. What If the Receiving Cannot Be Saved?
If you are unable to save the receiving transaction, first check whether the required inspection has already been completed.
Some receiving workflows require inspection before the goods can be fully received.
If the inspection has not been completed, complete the required inspection first and then return to the receiving process.
Common Cause
Receiving cannot be saved because inspection has not been completed.
Solution
Check whether the Purchase Order requires inspection.
Open the relevant inspection process.
Complete the inspection.
Save the inspection result.
Return to Receiving.
Add the batch, quantity, and expiry date.
Save and confirm the receiving.
10. Common issue in receiving Purchase order
No. | Problem | Possible Cause | Solution |
|---|---|---|---|
1 | Purchase Order is not available for receiving | PO has not been approved or is not ready for receiving. | Verify the PO status and approval status. |
2 | Cannot select the store | Store configuration item is not added to stock | Verify that the user has access to the required store. |
3 | Cannot add batch | The + action was not selected or batch information is missing. | Click the + icon beside the item and enter the required batch details. |
4 | Receiving cannot be saved | Required inspection has not been completed. | Complete the required inspection and return to receiving. |
5 | Quantity is incorrect | Physical quantity differs from the PO. | Count the delivered goods and enter the actual received quantity. |
6 | Wrong expiry date entered | Expiry date was entered incorrectly. | Verify the physical packaging and correct the expiry date. |
7 | Multiple batches are not recorded correctly | All quantities were entered under one batch. | Add each batch separately using the + icon. |
9 | Wrong store received the stock | Incorrect store was selected. | Verify the selected store before confirming the receiving. |
10 | PO still shows pending quantity | Not all ordered quantities have been received/accepted. | Review the pending quantity and receive the remaining items if delivered. |